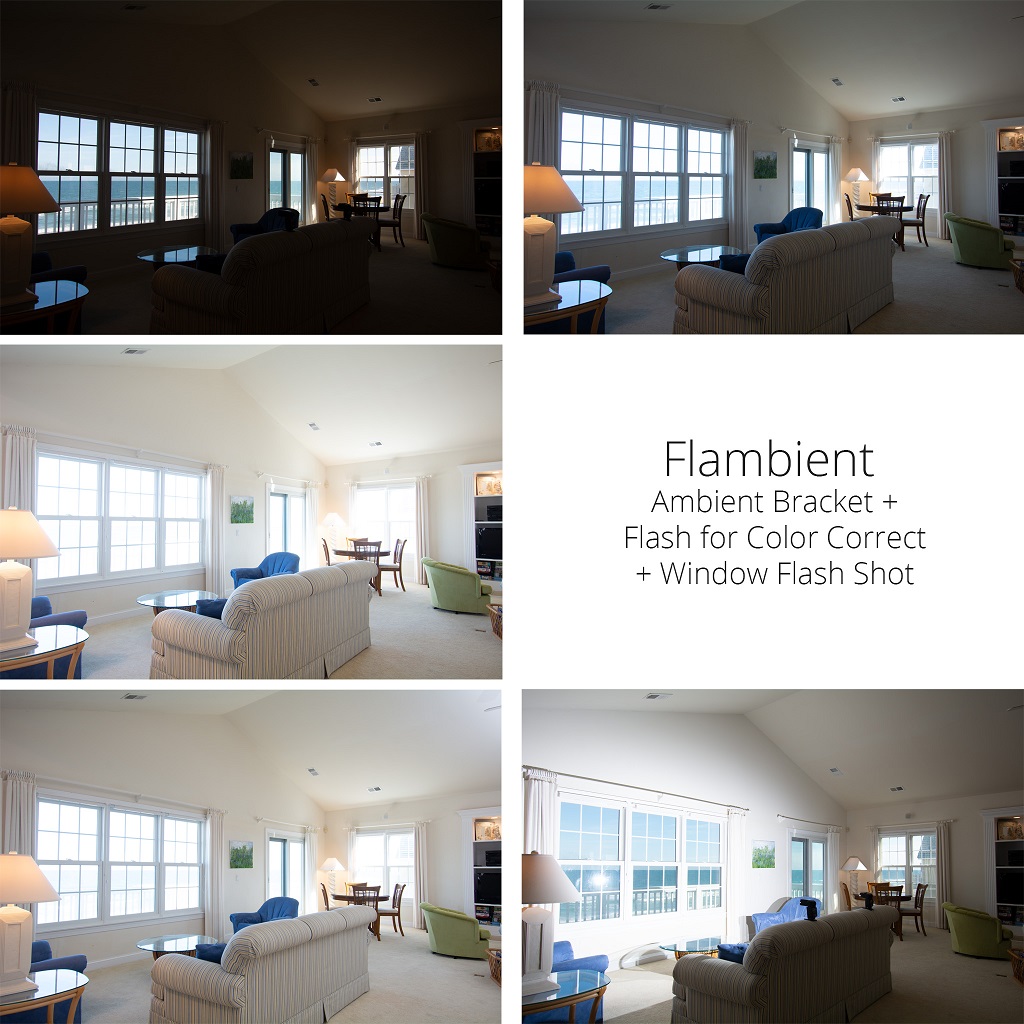
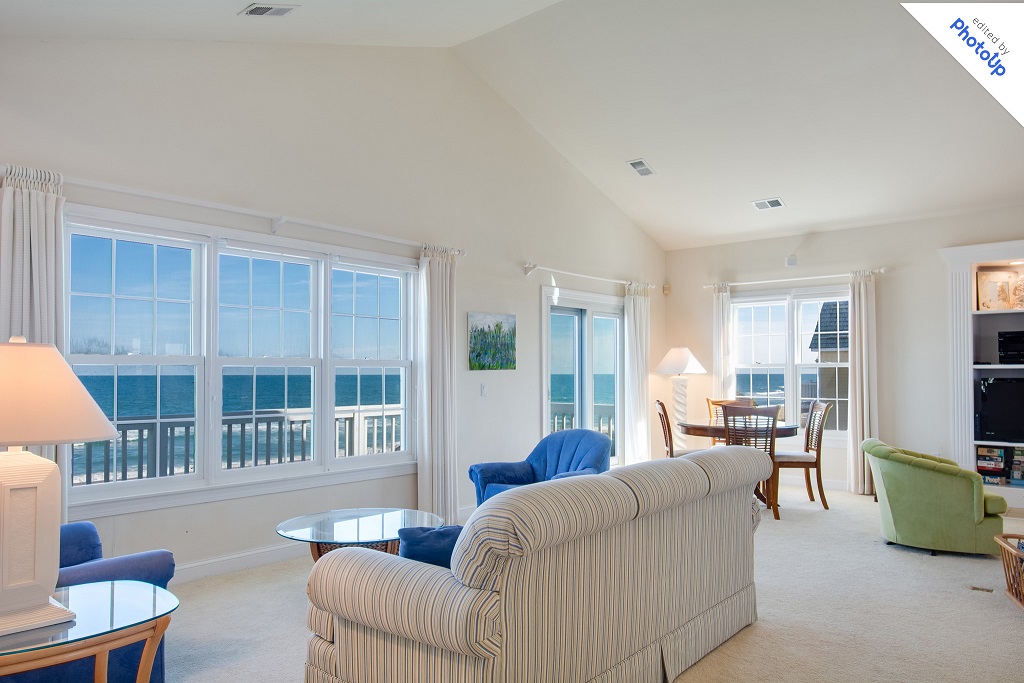
The “flambient” method for shooting real estate photography involves combining both flash and ambient light in your shots. The flambient method is one of the most fastest growing methods for shooting real estate photography. There are literally hundreds of ways to shoot and edit in the flambient style and this tutorial is not meant to be comprehensive, but more of a simple introduction to what flambient is and how you can use it to capture great shots that highlight the best features of homes.
The Basic Flambient Shooting Techniques
We recommend shooting at least three shots when shooting a typical room in the flambient style.
1. The Ambient Shot
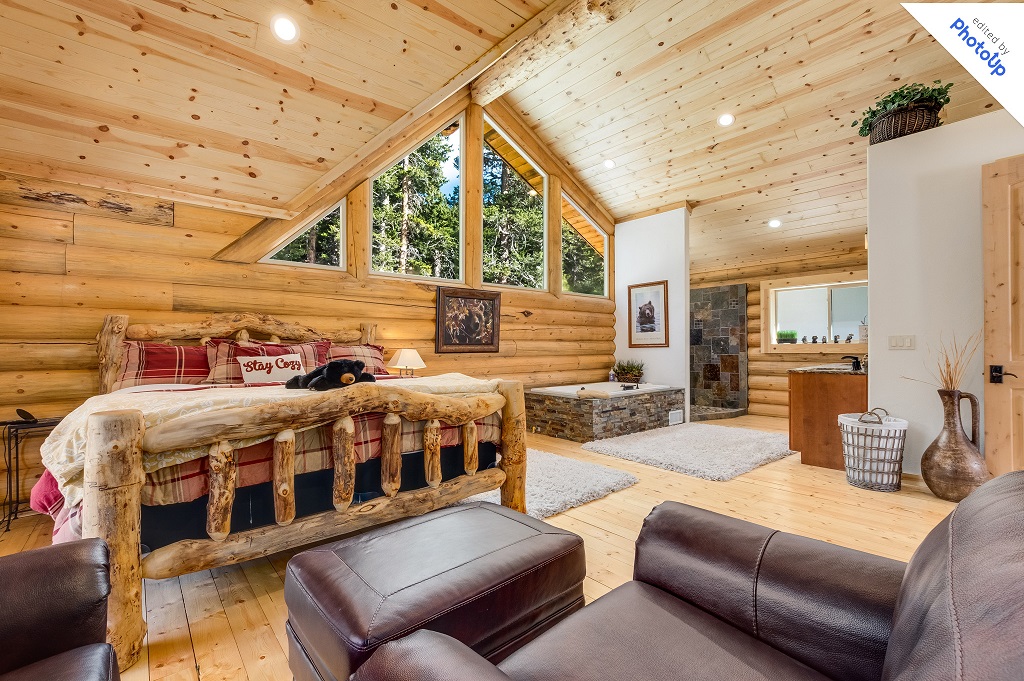
You should use no flash for this shot, just the natural light of the room. Expose in the middle so you get a nice overall picture of the room and shoot in RAW so you can push the bounds of the dynamic range.
I like to think of the exposure of this shoot as “if only” – i.e. if I could only use this one shot to make my final image, would it capture what it needs to in this room. If you have a room with extreme dynamic range, you should shoot a bracket of 3 images, with 0 as the “if only” exposure and adding -2 and +2 shots to ensure you capture the shadows and highlights.
In PhotoUp’s master process flambient style, the ambient shot forms the base of your final image but that is not always the case as some photographers like to use the flash shot as their base image.
2. The Flash Shot
The goal here is to get a really well exposed image where the view out the window looks good, the interior is brightened by the flash and the walls have their natural color.
To accomplish this we recommend taking your flash off camera and holding it 18 inches to 2 feet below a nice white ceiling pointing straight up into the ceiling. You can leave the flash on camera and get much the same look, but the closer the light is to the ceiling without being too close, the less likely you are to get flash created shadows from objects in the room.
Your flash power will depend on how you have to expose to get a nice window exposure. The flash will not reach out the window, so expose for the view and power up or down the flash to get the right interior exposure.
The main purpose of this flash shot for PhotoUp’s master process flambient style is recovering the natural color of the walls and objects in the room so it’s very very important to bounce the flash off a white object in the room, usually the ceiling.
3. The Window Shot(s)
When you have a nice window view you want to capture, we recommend shooting a third shot specifically for the windows.
Expose for the windows and point a high powered flash directly at the window frames. This may sound strange, but the flash pointed directly at the window frames will make the blending process in post significantly easy.
It’s much easier to have the flash off camera for this but on camera can work if the flash is powerful enough and the windows not too far away.
Experiment with angles to ensure a shot with the least flash reflections and if you can eliminate them entirely, turn off your flash and shoot one shot without the flash in addition to your flash frames – just make sure not to adjust the camera exposure at all.
Why Shoot Flambient
The struggle in real estate photography is trying to balance shots that look natural, as the eye would see it in person, with shots that are bright, vibrant and capture the natural colors of the room.
This is a struggle because shooting in just ambient light, while the most natural looking, often results in walls that have shifted or lost most of their color and shadow areas that are a little too dark – especially when the home itself is a little on the dark side in terms of natural light.
Shooting just flash however, unless you are really good with using multiple off camera flashes, can result in an image that looks fake – with shadows pointing towards the windows instead of away from them and hot spots in areas that were closer to the flash and dark spots in areas that were farther away from the flash.
Flambient photography recognizes both the strengths and limitations of shooting all flash or all ambient and attempts to combine them to get the best of both worlds.
Beyond the Basic Process
Three shot flambient can be just a starting point for some photographers. I’ve already mentioned simple upgrades such as shooting a bracket instead of a single ambient shot and multiple window shots to get reflections in different windows to make for easier blending, but really there is no limit to how complicated you want to go make the flambient process – remembering, of course, that the more complicated you make the process the more time it can take to shoot the frames. The basic process allows for a simple and quick process that will achieve fantastic results in most cases. There will always be cases where three shots won’t work, and we’d actually highly recommend starting with the bracket approach for your ambient frames just in case, but those are the times where you get to experiment a bit and potentially learn something that will help you in future shoots.
Flambient Examples
Check out these examples of flambient real estate photography:
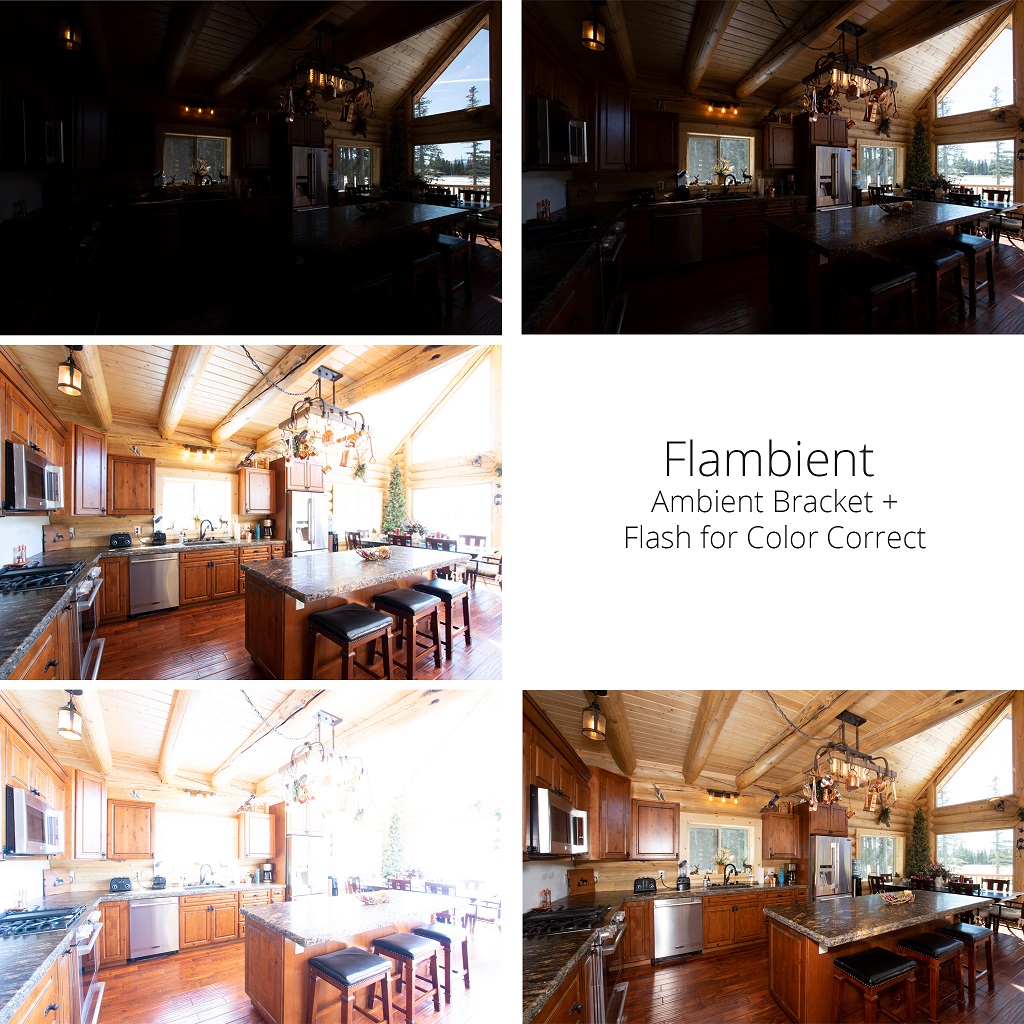
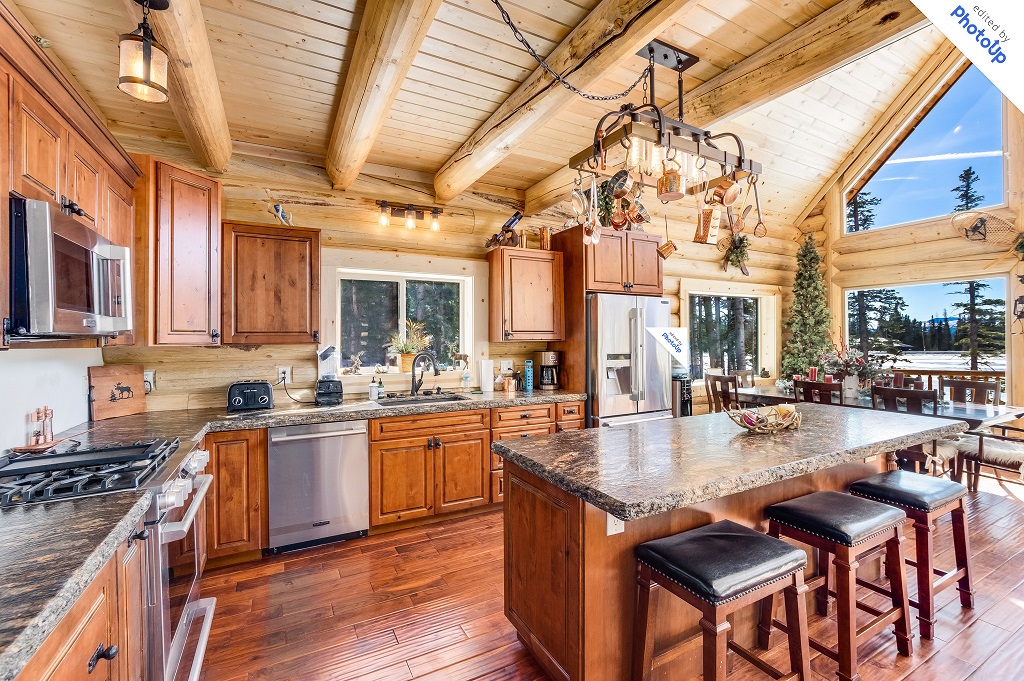
photo taken by Christopher Weber of Orchestrated Light Photography, Inc.
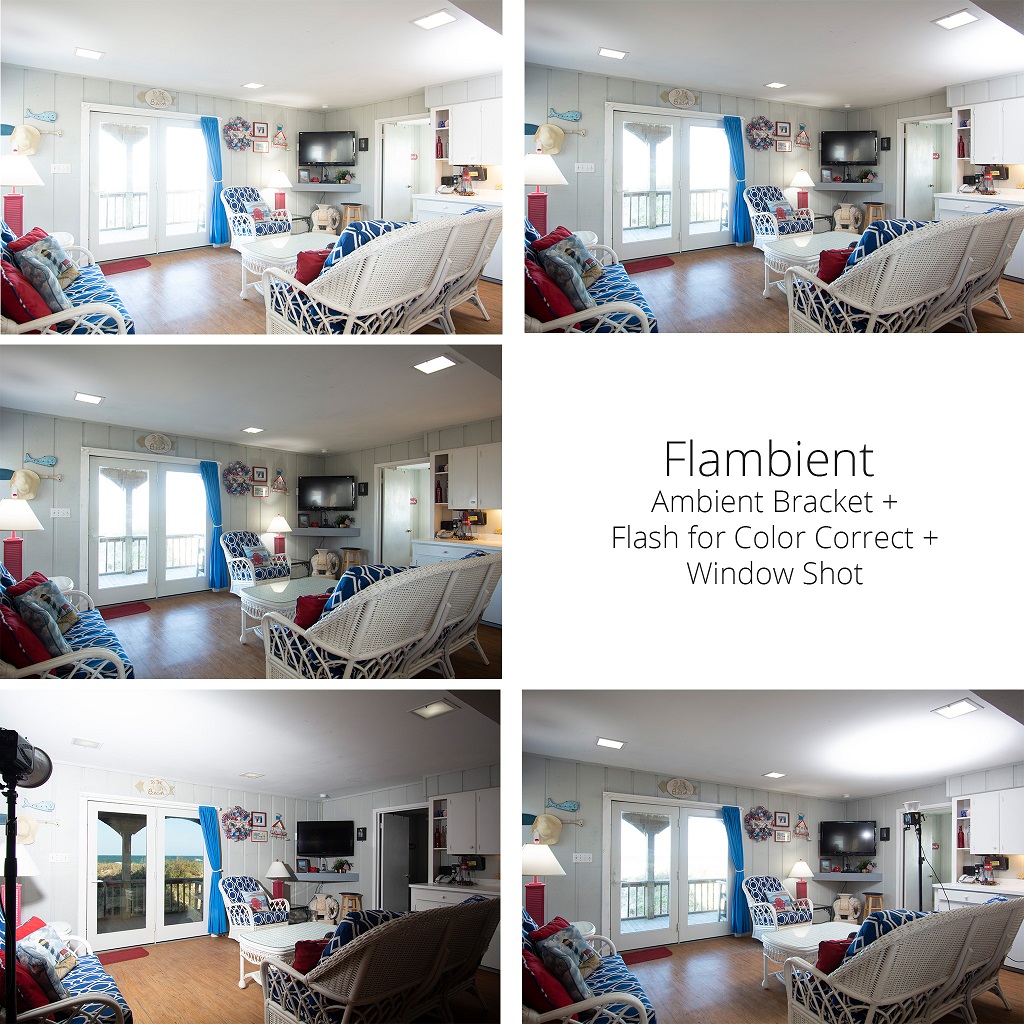
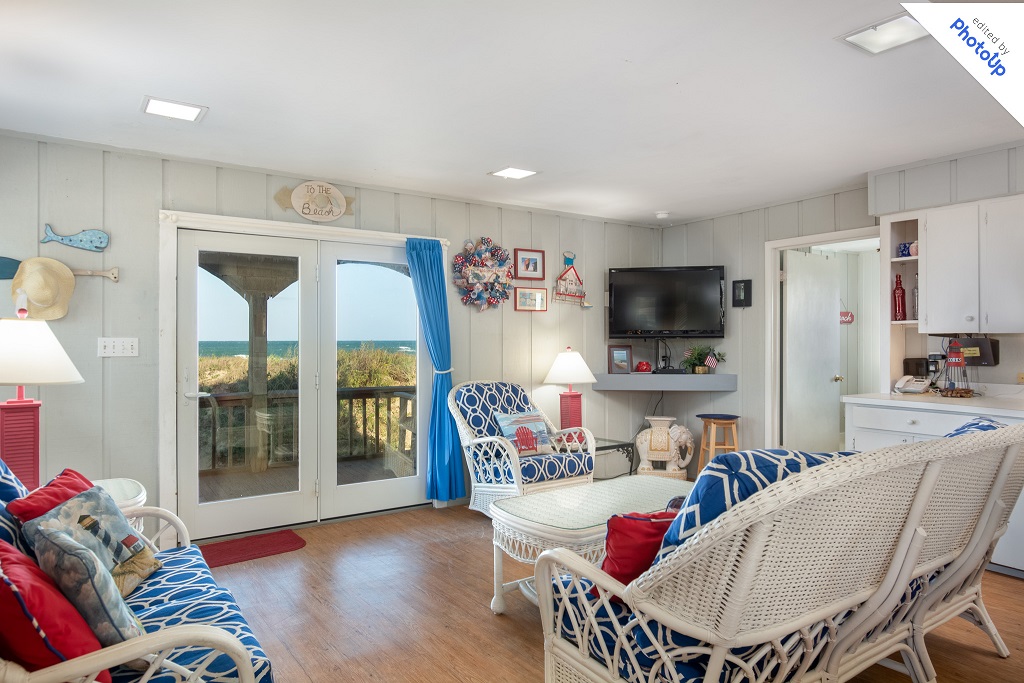


photo taken by Christopher Weber of Orchestrated Light Photography, Inc.
