Telling your photo editor what you want to be done to your real estate photo can be a challenge. How do you tell your editor that you want the image to look “better”? To what degree? Know how to read a histogram? Do you know your camera’s dynamic range? Are you familiar with real estate photography terms?
Want your real estate photos exactly the way you want them edited? Then it’s important to know these real estate photo editing terms. Doing so makes communication much easier between you and your editing team. Being on the same “frequency” with your editing team helps you get your message across to the team. At the same time, they can provide you with more consistent results when editing your real estate photos.
1. Histogram
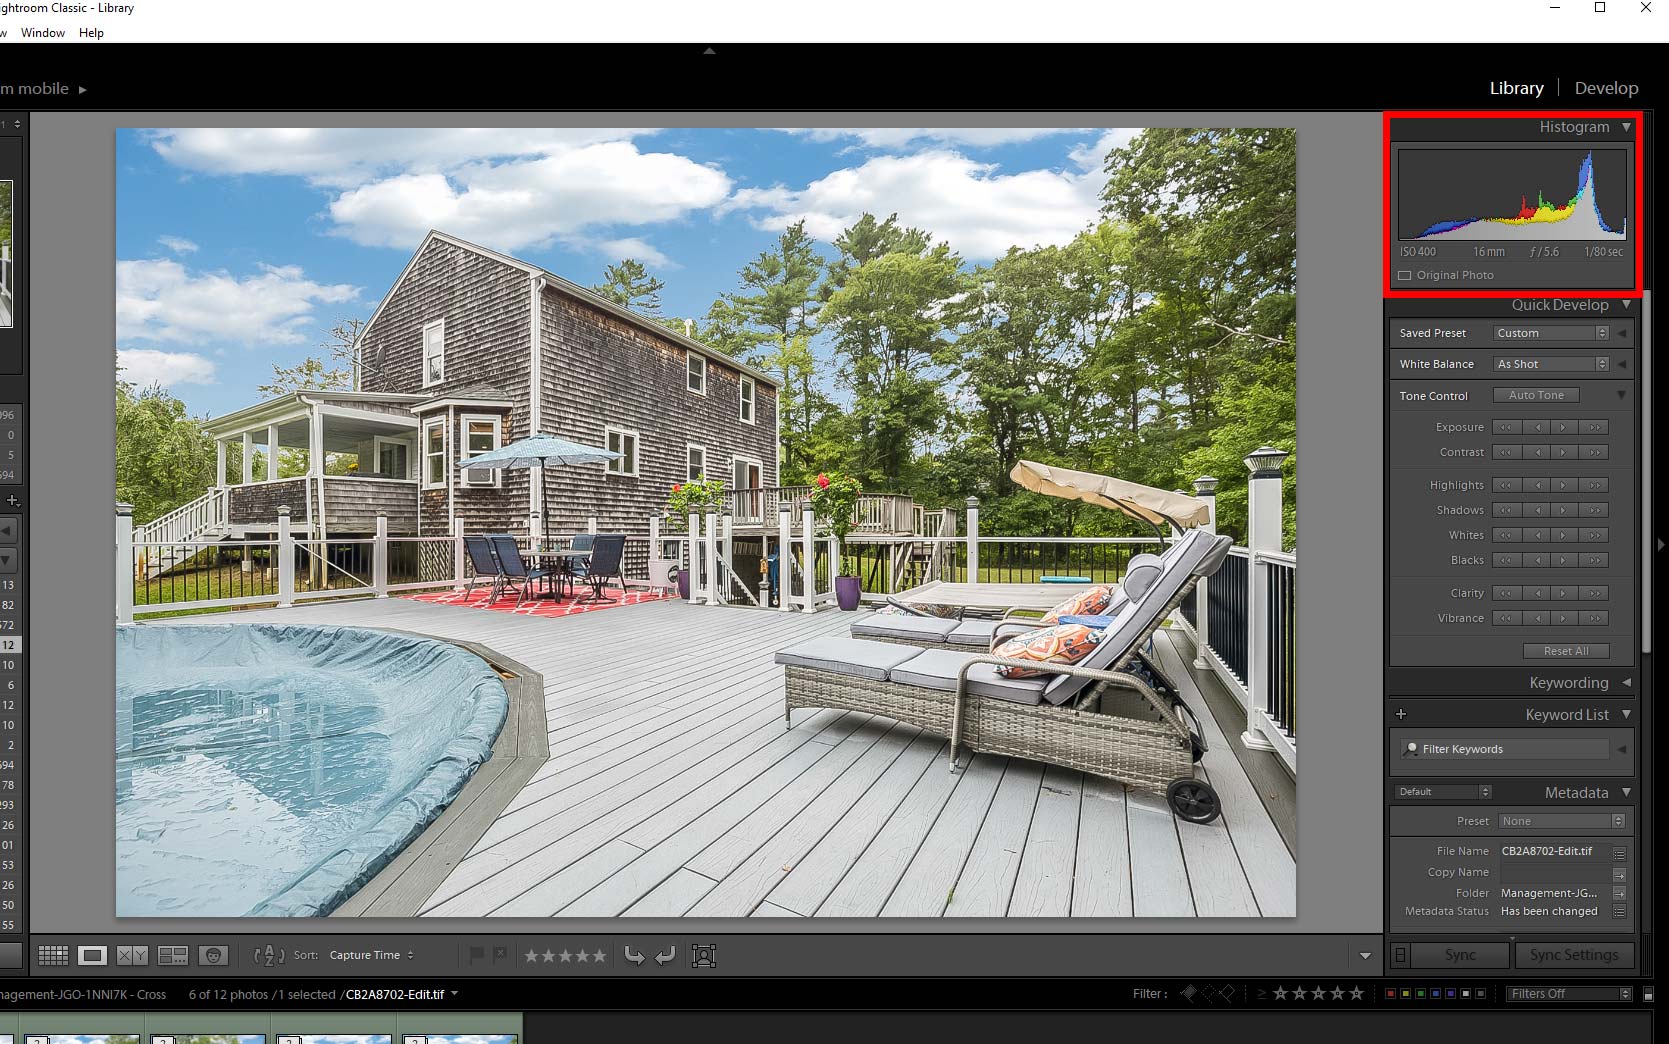
If you look closely at a photo, you will notice that it has bright points, dark areas, and in-betweens. The brightest parts of an image are the highlights, and the dark ones are shadows. Midtones are those that are not too bright nor too dark.
You can see the degree of brightness and dark tones through a histogram. A histogram, which looks like a multi-colored graph, represents the distribution of a photo’s pixels based on their luminosity. In basic terms, the histogram is a graph with the brightness level (dark, medium, bright) along the bottom (horizontal) axis of the graph and the amount of pixels at that brightness level along the vertical axis. The left side of the histogram represents shadows while the right shows highlights. The more pixels at a brightness value the higher the corresponding point on the graph will be. A well balanced photo won’t have any “gaps” in the histogram but instead will show some amount of pixels at all brightness levels.
Knowing how to read the histogram enables you to get the most out of tone curves while achieving the ideal contrast and exposure.
2. Hue, Saturation and Vibrance
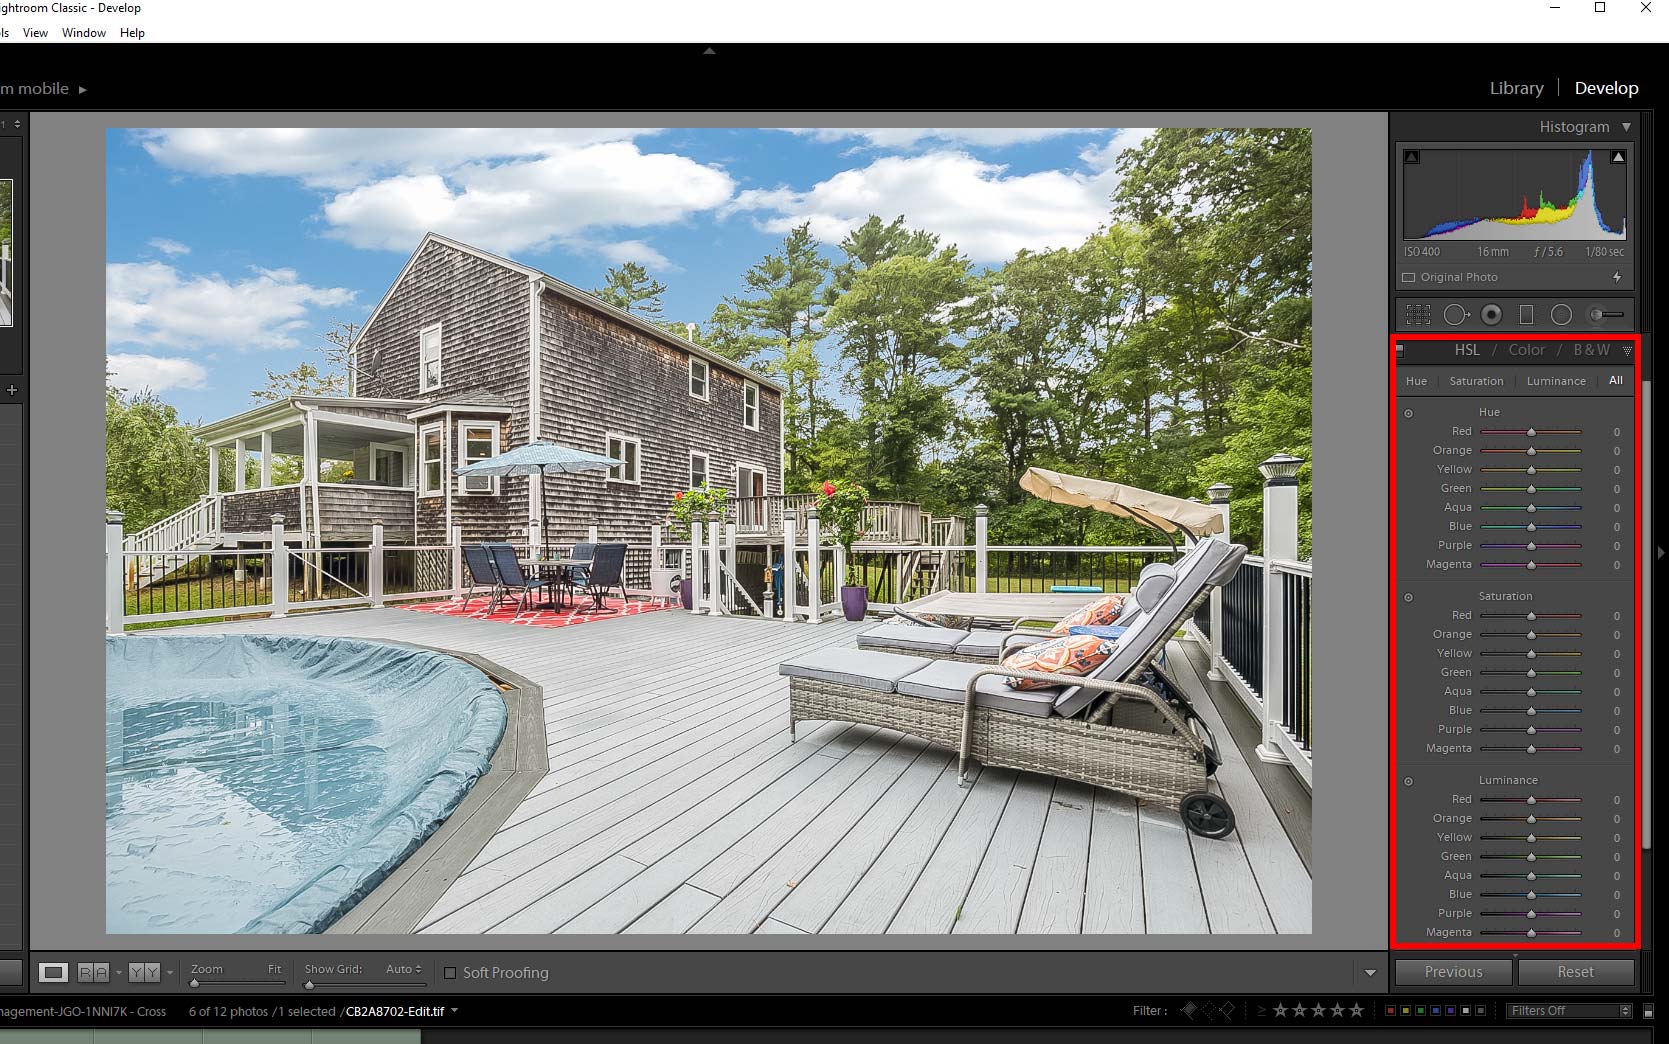
Color saturation is the intensity of colors in an image. Have you ever encountered the term “hue”? Well, hue refers to the tone of a color (are the oranges more red or yellow?) while saturation is about how intense that hue is. Sliding the saturation slider affects all the colors in the image.
Vibrance is similar to saturation. However, it only affects muted colors, the colors that aren’t already saturated, leaving skin tones and saturated colors untouched.
Make adjustments between the two sliders together until you get the effect that you want.
3. Sharpening
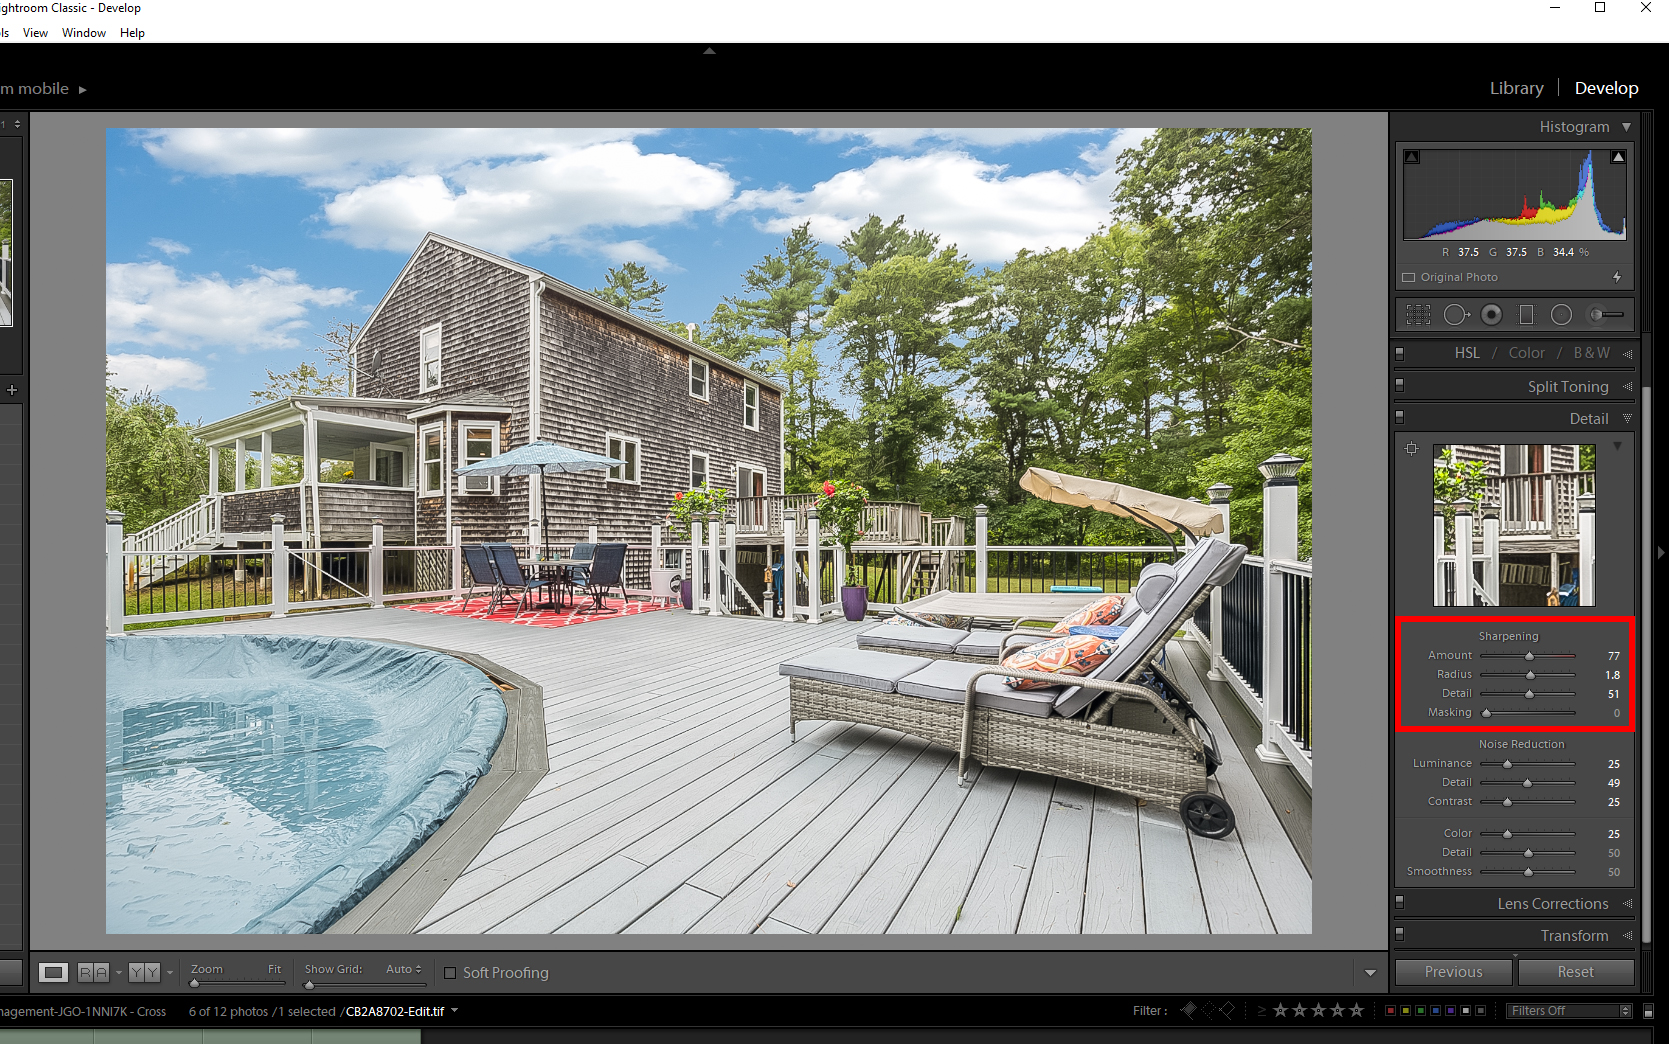
Camera lenses and sensors almost always blur an image to a certain degree. This may be due to dirt, filter distortion, technical limitations, and many other factors. Thus, sharpening is required at some point.
Image sharpening is a technique that highlights the fine details and edges of an image. Sharpening usually involves adding some noise, emphasizing texture, or boosting contrast.
The level of sharpening also depends on the end use of the image whether it will be viewed on a digital screen or be printed on a solid substrate such as paper or canvas.
4. Noise
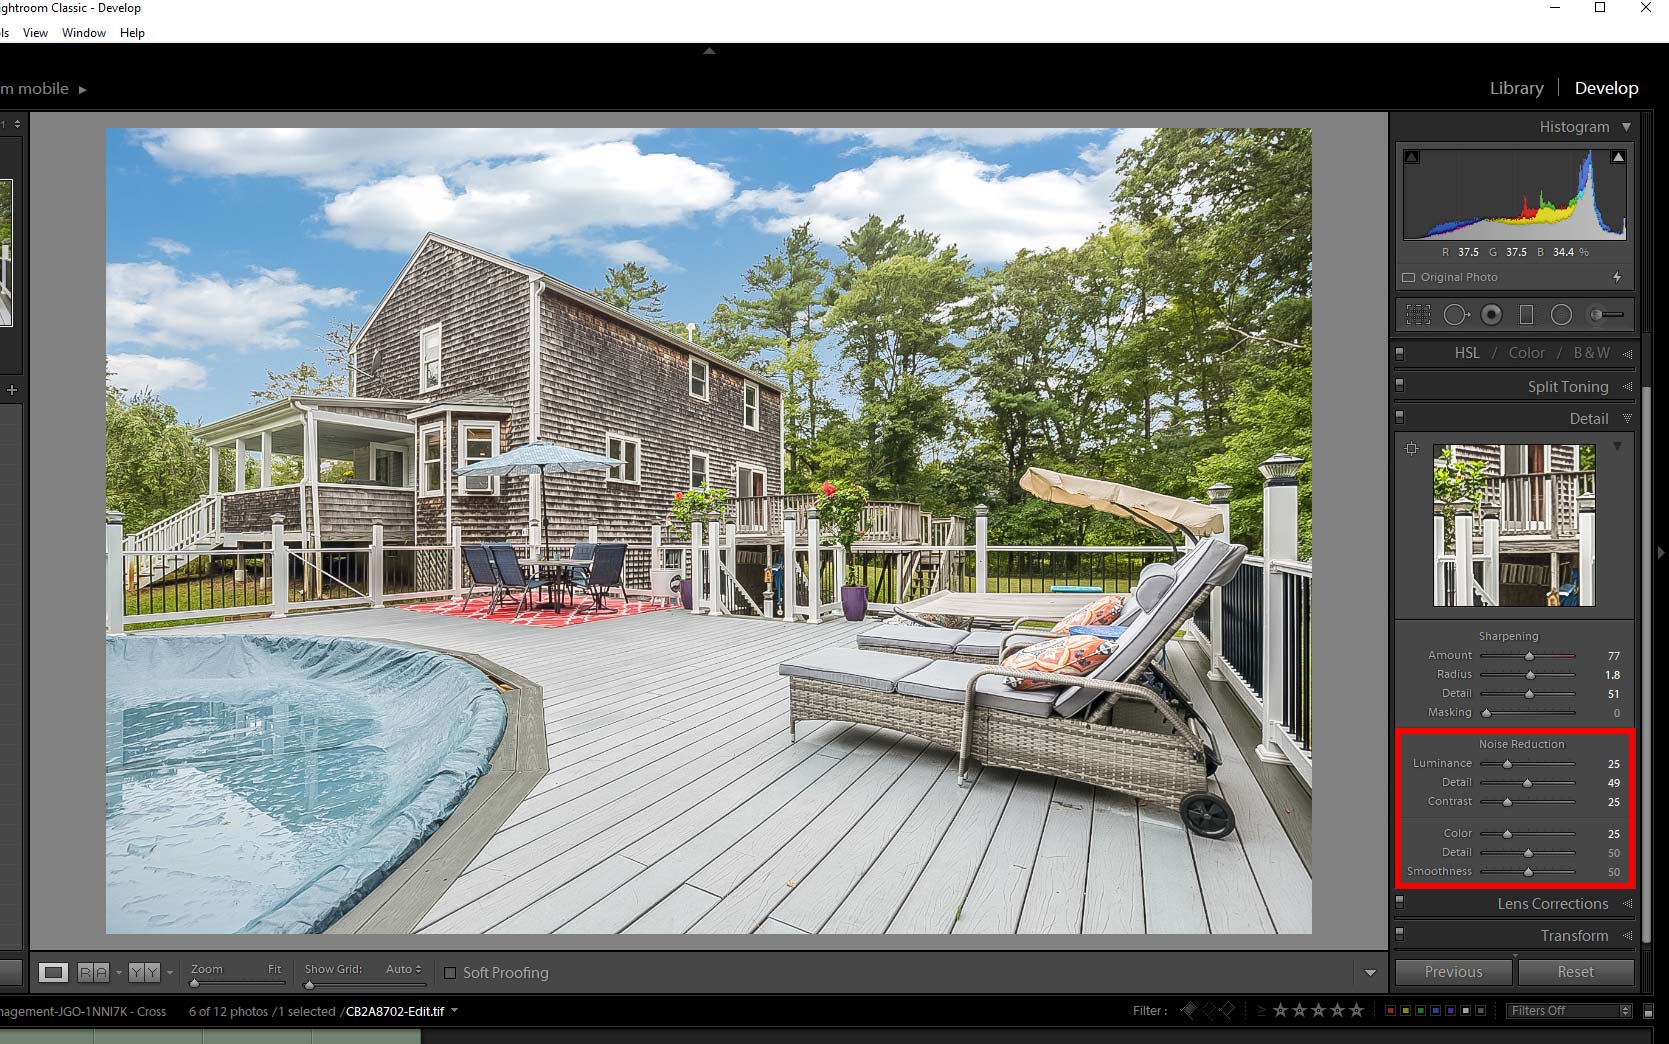
Noise is a kind of visual distortion, a random variation of color or luminosity in images. It looks like tiny specks or pixels. A “noisy” photo can look very grainy.
Various factors can cause noise—high ISO settings, long exposures, low light situations, over-brighting in post processing and more. Fortunately, noise can be reduced or removed with proper photo editing techniques.
5. White Balance

Visible light is actually made of several wavelengths, with each kind of light has a “dominant” wavelength. For example, light that comes from fluorescent lamps may have a bluish hue. Illumination from incandescent bulbs can cast yellowish hues in rooms. The light coming through from that green curtain may cause a green color cast on the interior walls. The color of light affects how the final image looks.
White balance is a camera setting or a photo editing process that alters the color balance of light so that it appears neutral white. They make objects in the room that are supposed to be white look white. This neutral light counteracts the yellowish, bluish, and other unnatural color casts that might otherwise be present in the image.
6. Dynamic range
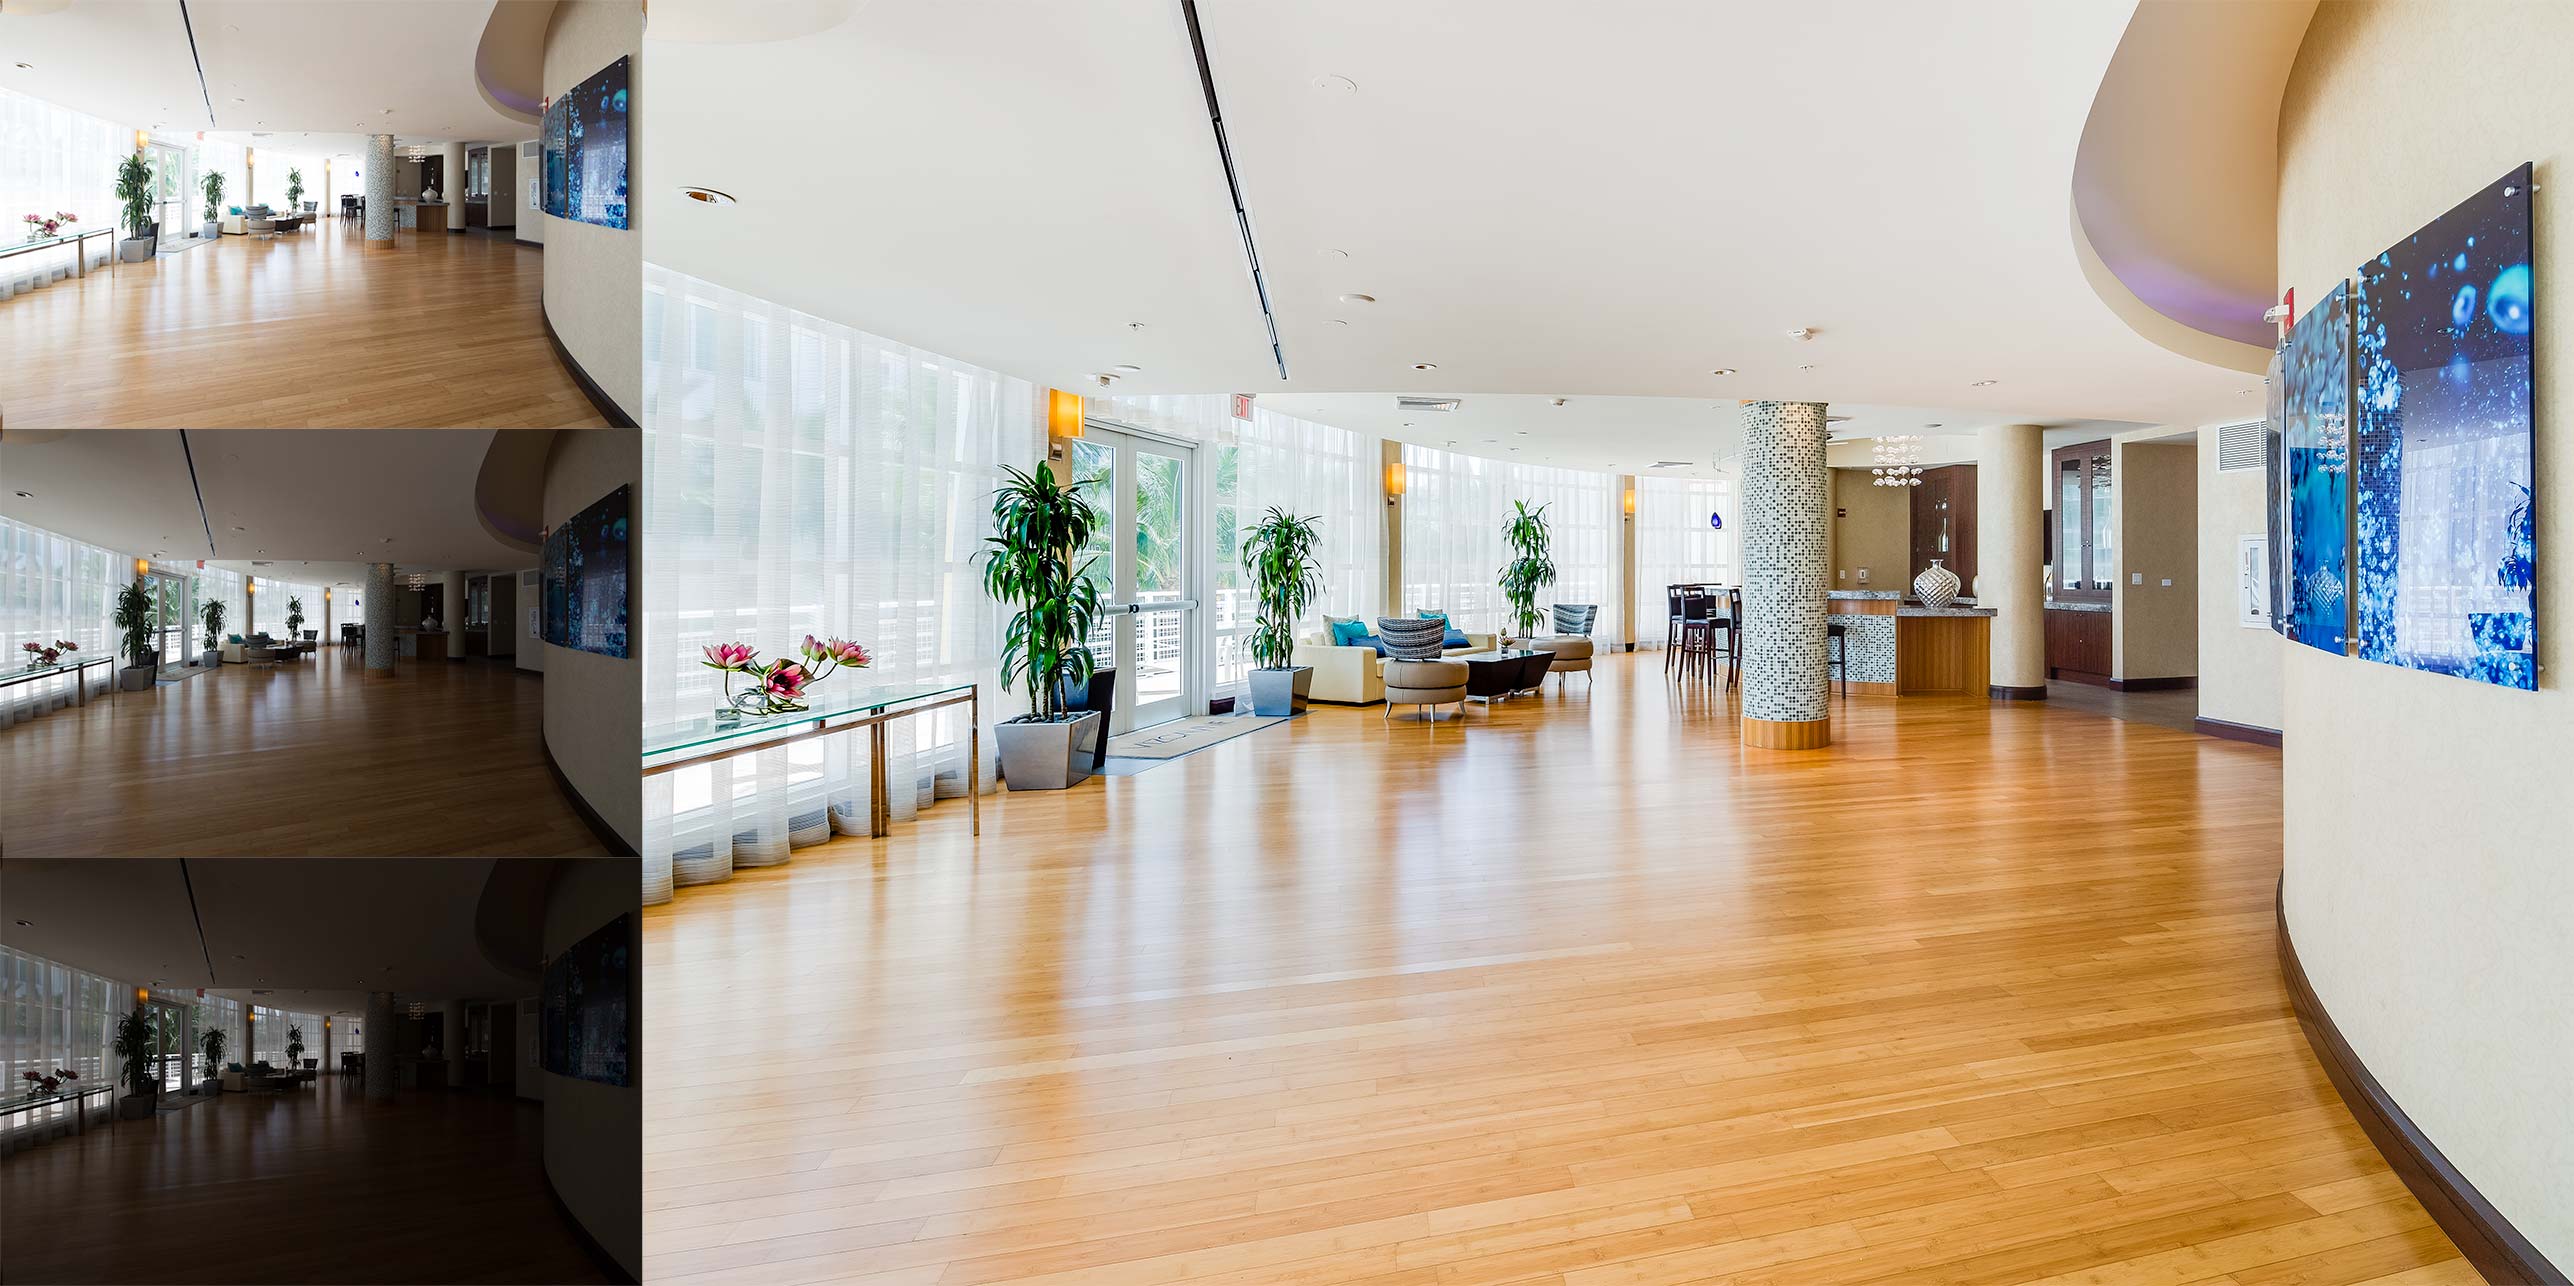
Have you taken a picture of a house during a bright sunny day? You will notice that you lose detail in the highlights or shadows or both even with the right exposure settings. The culprit is most likely the limitation of your camera’s dynamic range.
Dynamic range refers to the range between the brightest and darkest tones in the photo. A high dynamic range (HDR) means that there is a wide range of gradients between light and dark areas.
Kinds of Dynamic Range
There are two kinds of dynamic range to check: that of the subject and that of your camera. The subject’s dynamic range is a measure of light intensities from highlights to shadows. During late afternoons when the light is soft, for instance, the dynamic range is small. This makes it easier for your camera to capture details in both the brightest and darkest parts of the scene. But at noontime during a hot, cloudless summer day, the dynamic range is high. Often, it usually out of the range of the camera’s own dynamic range.
Different cameras have different dynamic ranges. If the dynamic range of your subject does not go beyond your camera’s, you can shoot an ideally exposed photo. If it exceeds your camera’s dynamic range, then parts of the image will either be underexposed or overexposed.
To check, look at the histogram (representing your camera’s dynamic range) on your camera’s back screen. If the histogram is cut at either end, the subject range exceeds that of your camera. Adjust your camera’s exposure settings; the histogram moves right or left as you do so. Continue adjusting until the histogram fits inside the display.
Sometimes, parts of the image remains underexposed/overexposed no matter your exposure adjustments. If your camera has a limited dynamic range, just take the same image in different exposures. With post-processing, skilled photo editors can combine these multiple exposures to compose a photo with perfect exposure that shows all details.
7. Blending
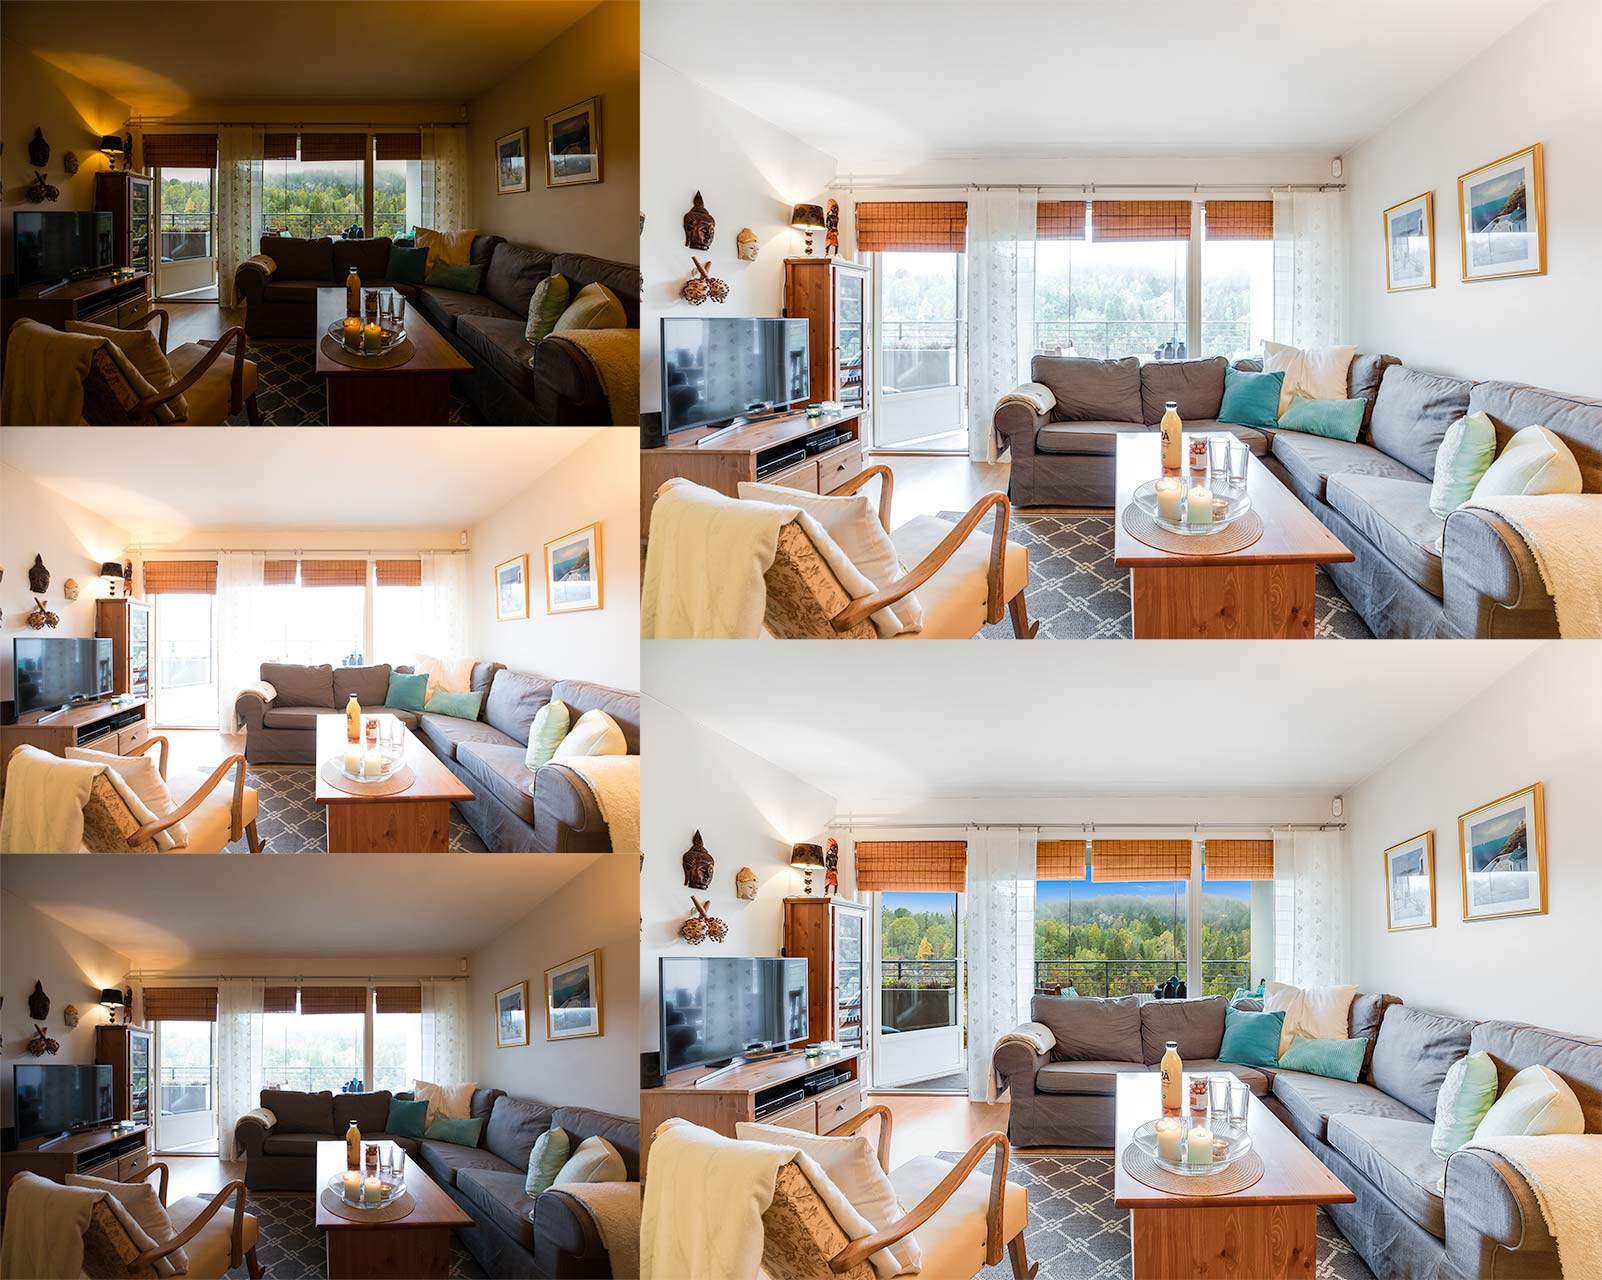
Blending is a method that combines two or more versions of the same image in a photo editing software to create a vastly improved final image. It is frequently used to achieve wider dynamic range, better overall exposure, a change of perspective, and more.
8. Object removal/addition
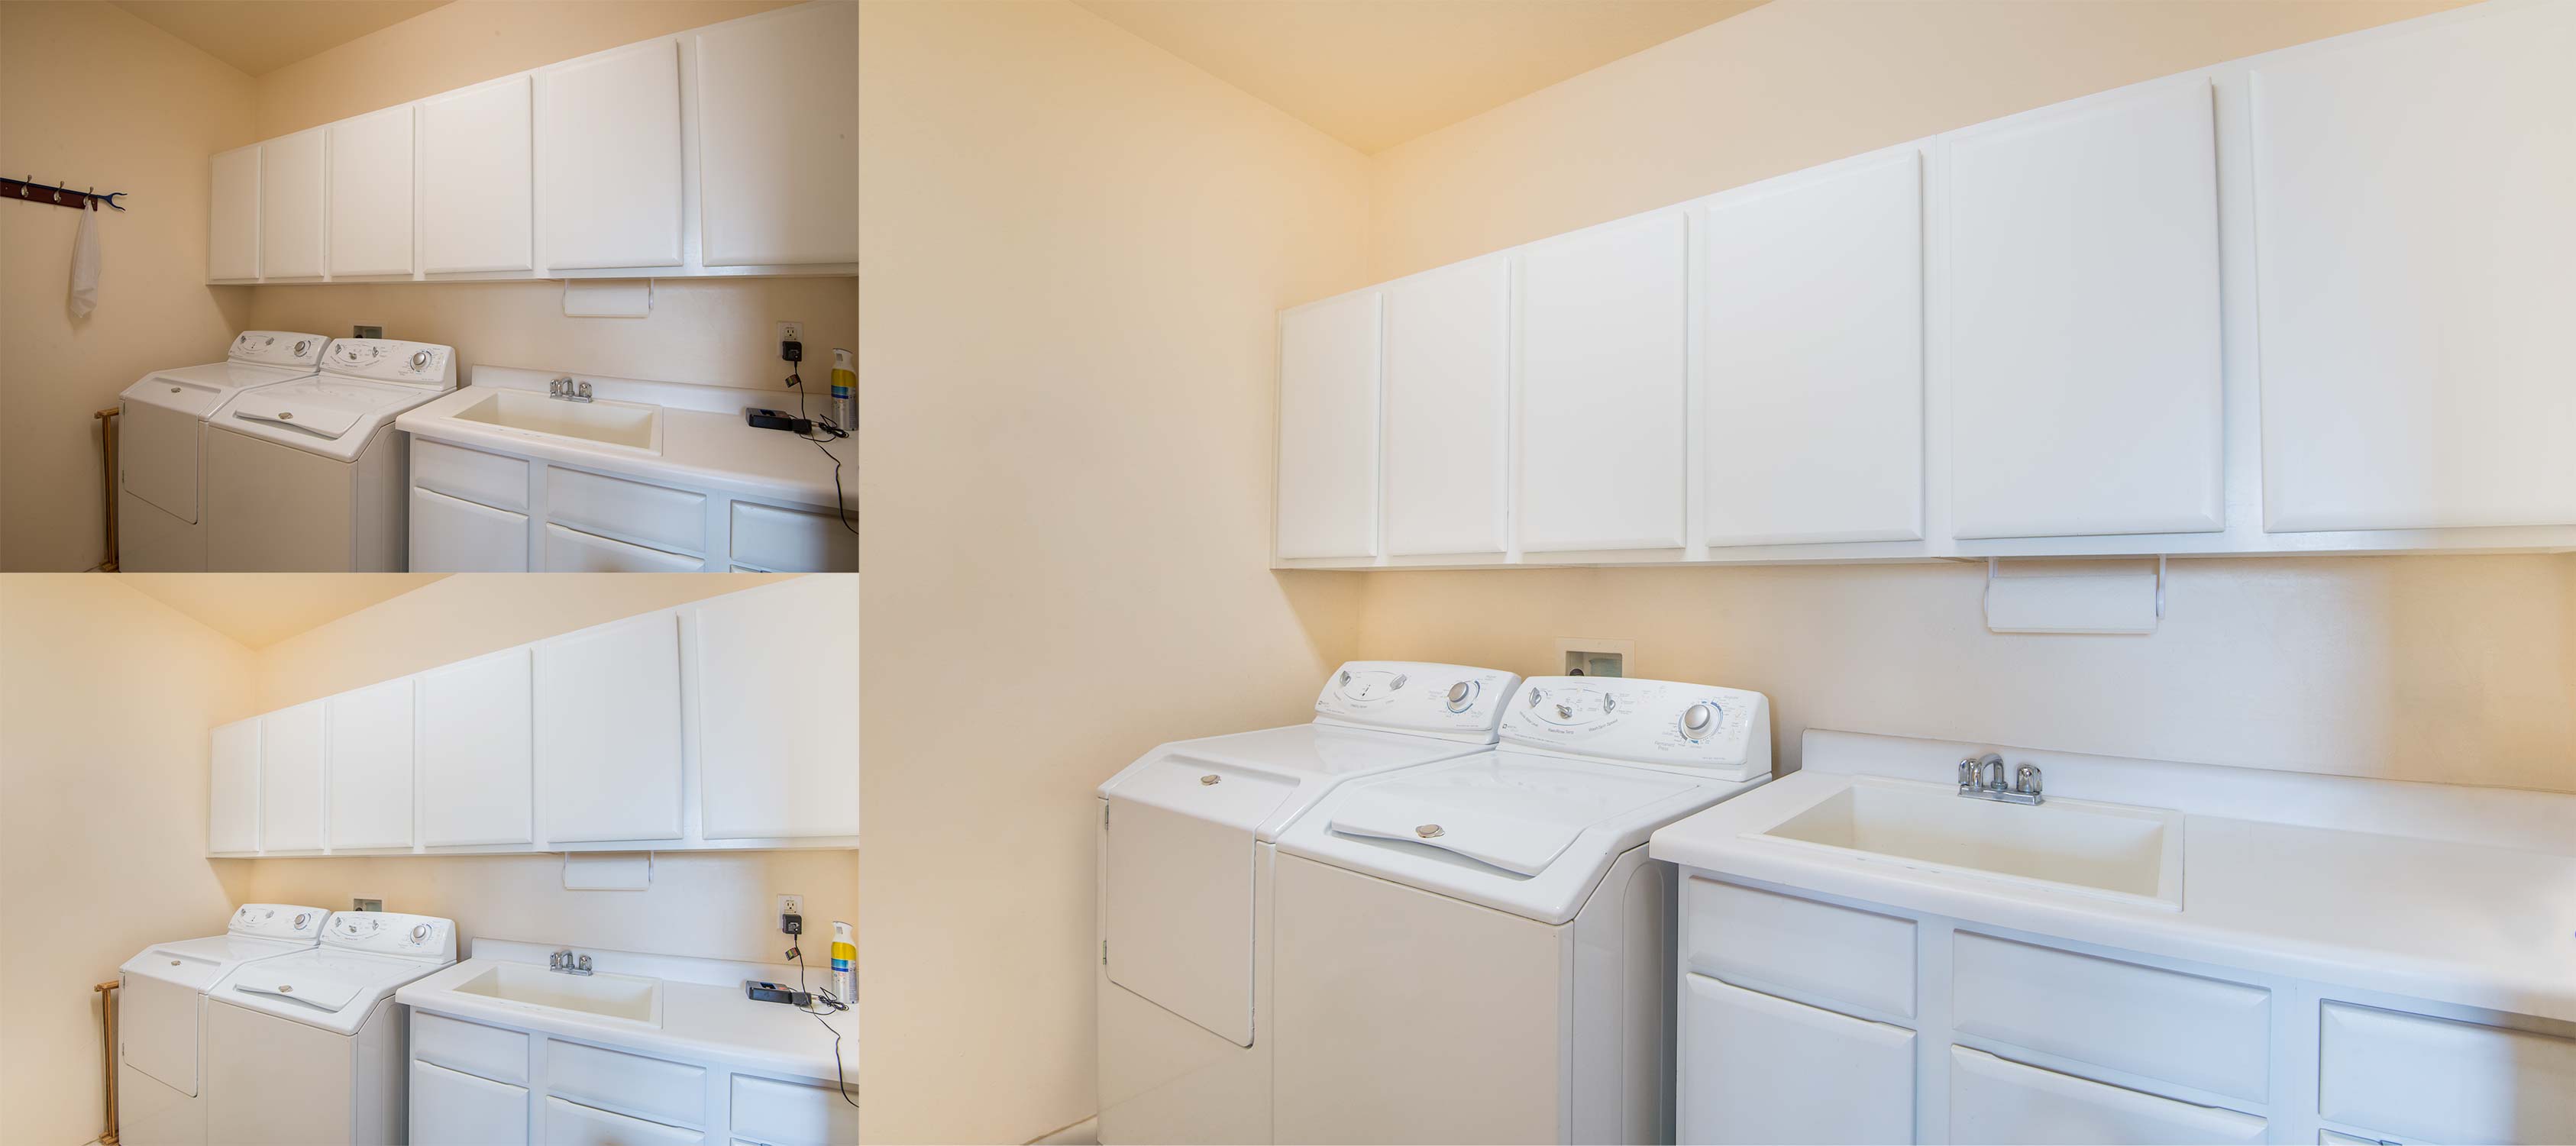
There are times when the image you took shows unwanted items like magnets on the fridge, cars parked in the driveway, or excess clutter on countertops. Well, you get the idea. Photo editors can get rid of these items through a process called object removal. They also make sure that after taking out unwanted items, the area where the objects existed are “restored” to make the image appear seamless.
Photo editors can also reverse the process. For example, they can add a warm fire to an empty fireplace, a nice scenery in a TV, or a glowing lamp to make empty spaces more interesting. They can also add furnishings and decorations through virtual staging.
9. Window Masking
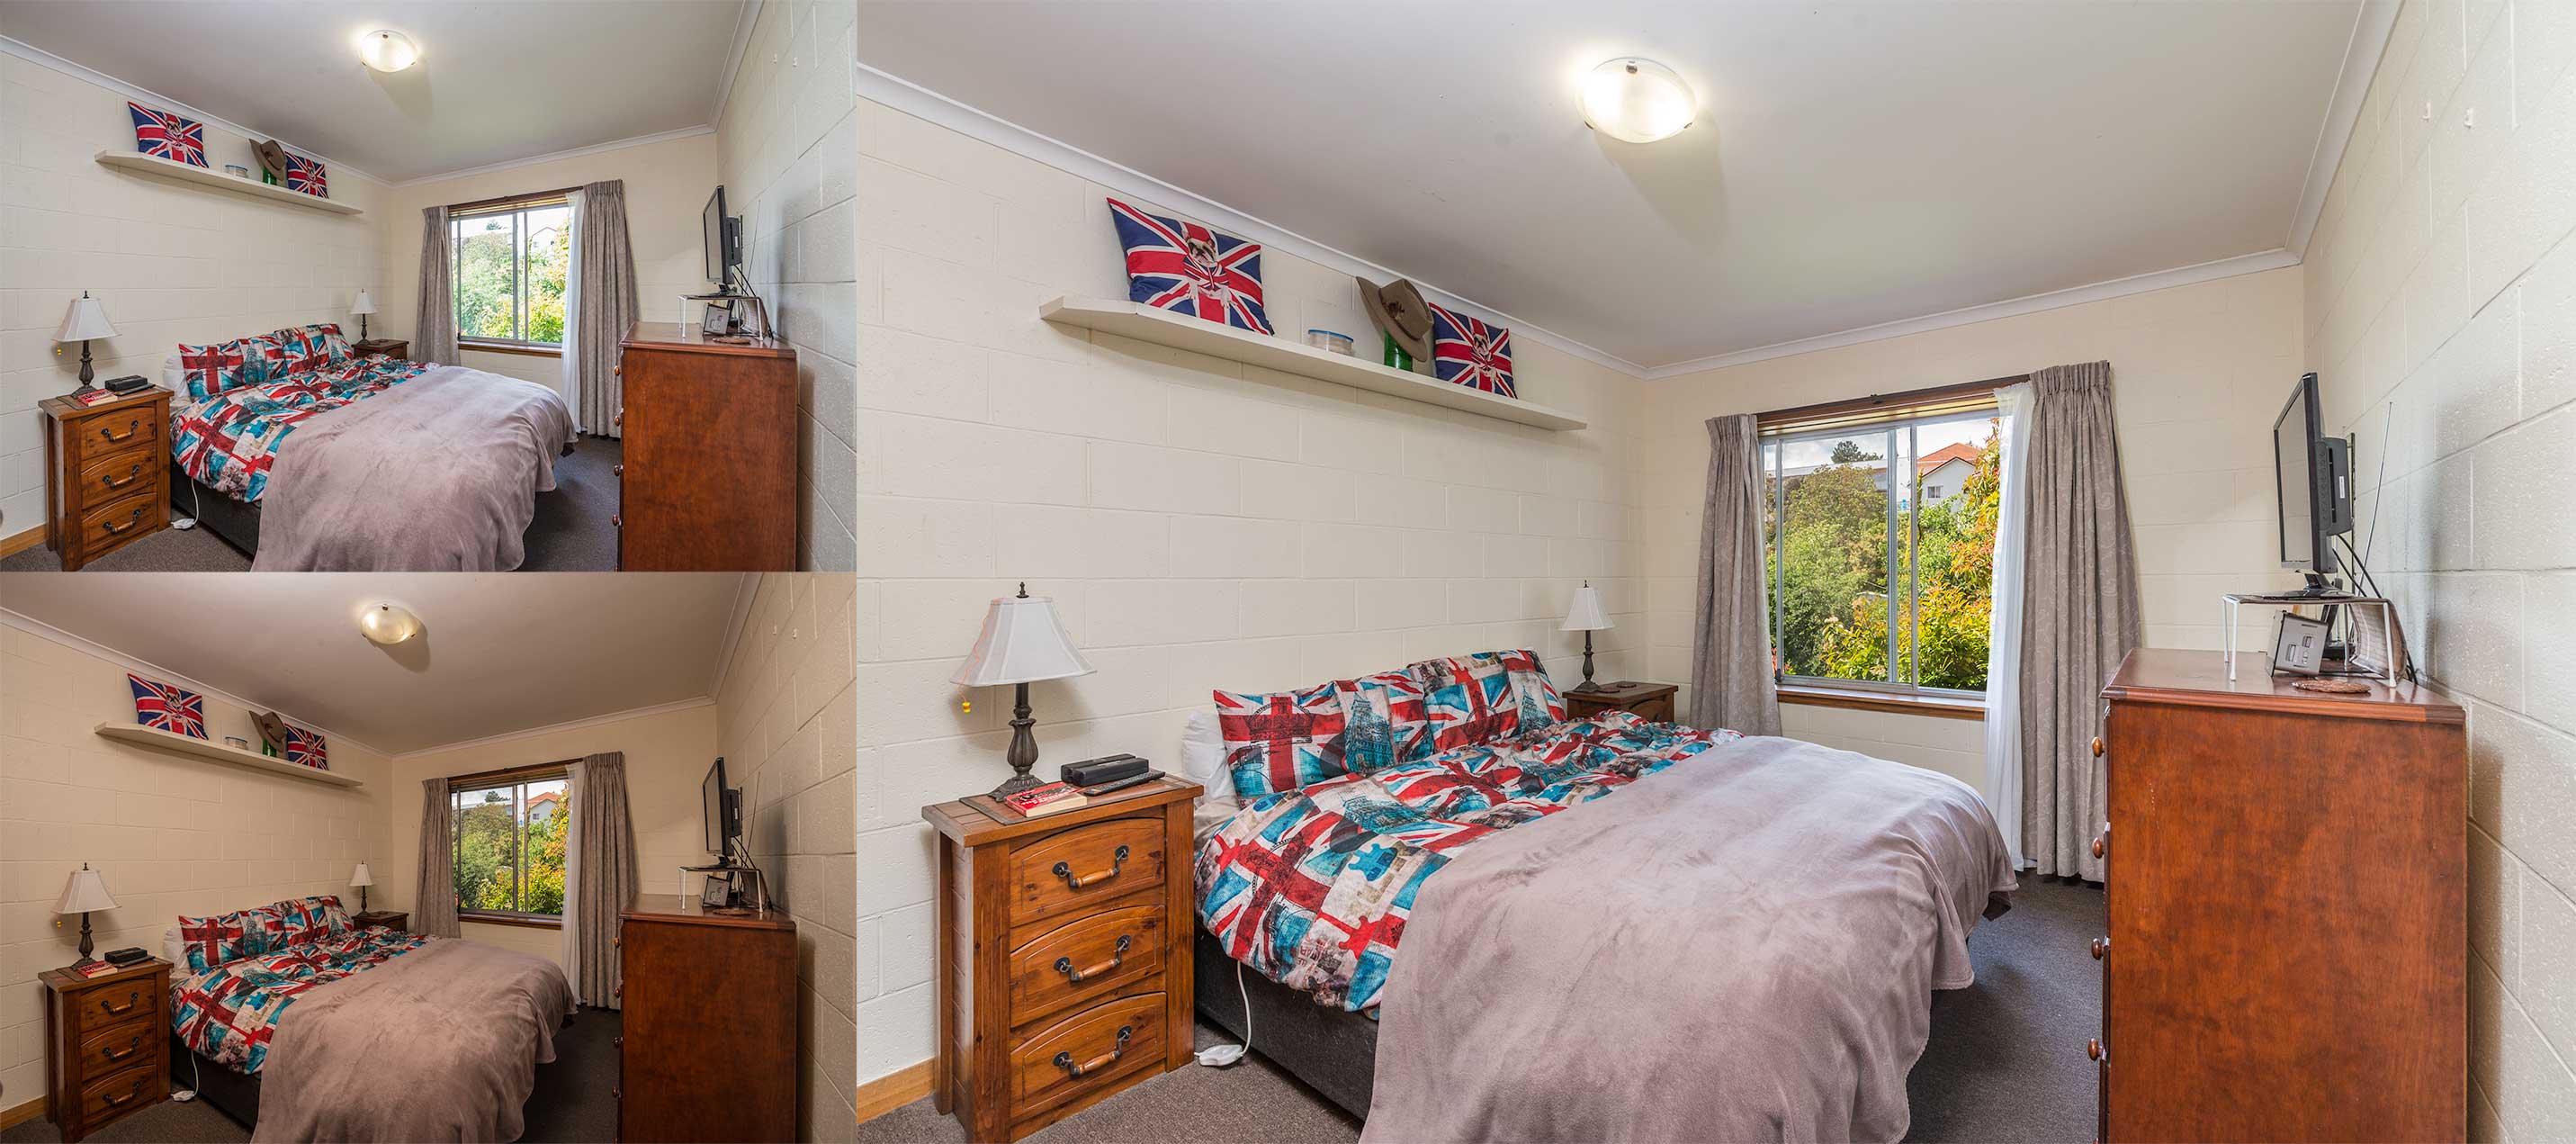
Getting perfectly exposed interiors and beautiful imagery outside the windows in the same image can be quite a challenge even for professional real estate photographers. Masking fixes this problem.
Window masking allows photographers to select individual layers and make changes without affecting the other layers. The idea is to take two shots of the same setting—the interior shot for one layer, and the same shot but with a beautiful window view for the second layer.
A photo editor can cut out the interior shot’s window and replace it with nice window shot. With a little bit of cleanup and image enhancement, you’ll have a stunning photo in no time!
10. Sky/Lawn Replacement
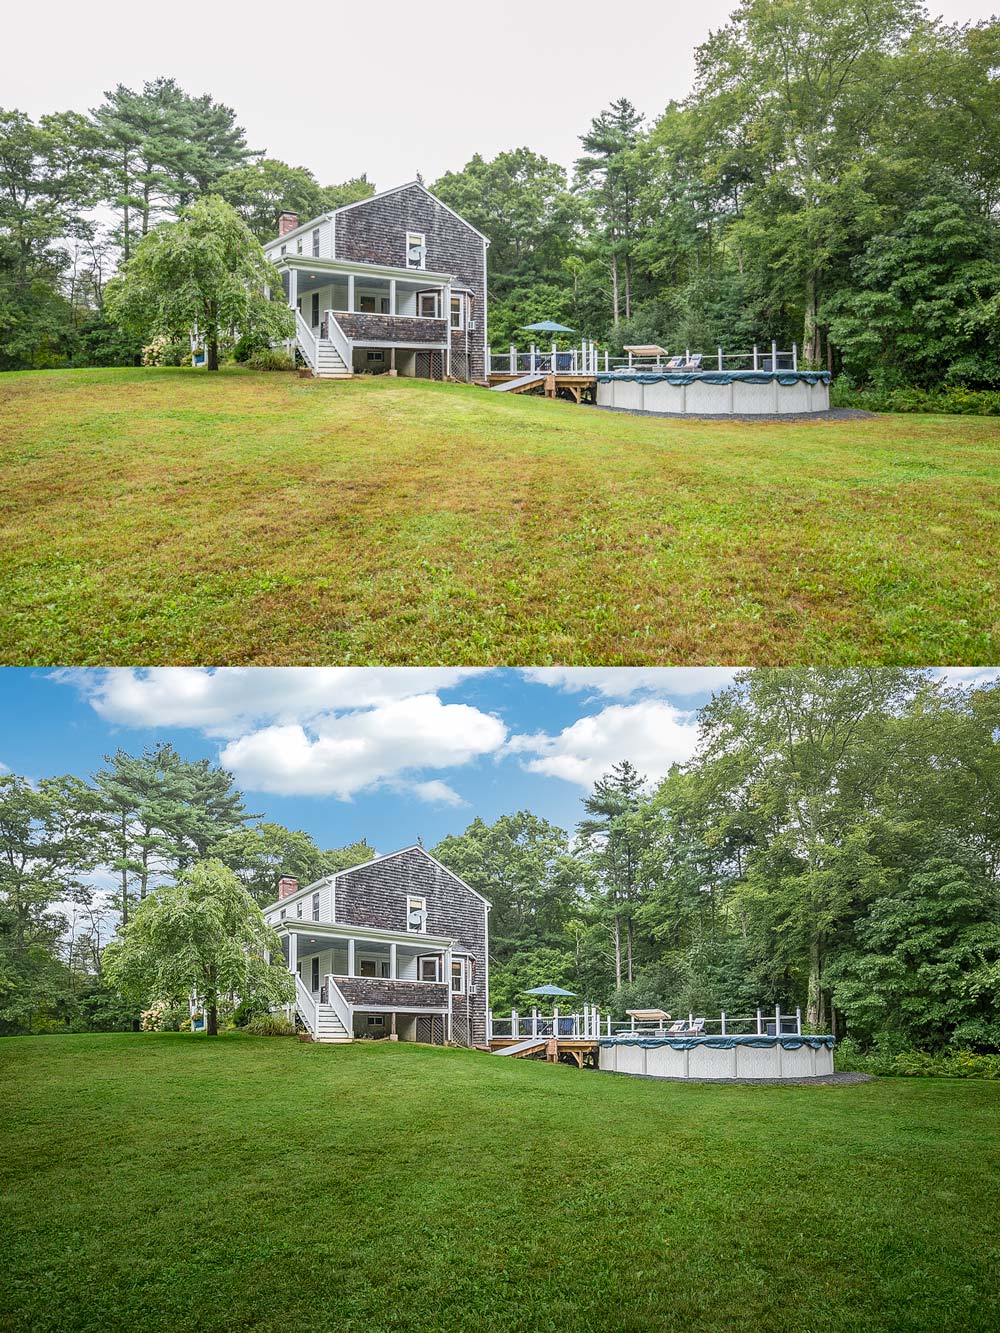
Photo editors can replace dull, gray skies with blue, sunny, clear skies. or dawn, dusk, and evening skies depending on your preference and the needs of the photo.
A lawn that is brown and patchy can be enhanced as well. Photo editors can clone green and healthy parts of the lawn, enhance the color, or simply replace the entire lawn altogether.
For high-quality, fast, and metric driven real estate photo editing services, choose PhotoUp, a premier real estate photo editing company, rated #1 by users on the Photography for Real Estate blog.
Upon registration, you will have a dedicated team of skilled photo editors, ensuring customized editing in your style and fast 12-24 hour turnaround. You will be given access to a comprehensive all-in-one photo management system where you can upload and receive photos, send instructions and feedback, and more. In addition, 24/6 live chat and email support are available.
Get started with your trial account today.


