Have you ever taken an exterior photo of a property on a bright, sunny day, expecting a vibrant photo. Instead, you end up with an image where the highlights are completely blown out! Or you intend to take a photo of a romantic dining room only to end up with an image showing dimly lit areas as black blobs. What’s going on here?
In most cases, the lights and shadows in the image are beyond your camera’s dynamic range. For those who are not familiar with the term, dynamic range is the difference between the darkest dark and the lightest light in the captured image. If the image exceeds your camera’s dynamic range, the highlights wash out or the shadows become black spots.
One way to remedy this issue is to use high dynamic range imaging, or HDR for short. This is a technique that adds more dynamic range to photographs. The objective is to produce a range of luminance similar to that perceived by the human eye.
How HDR Works
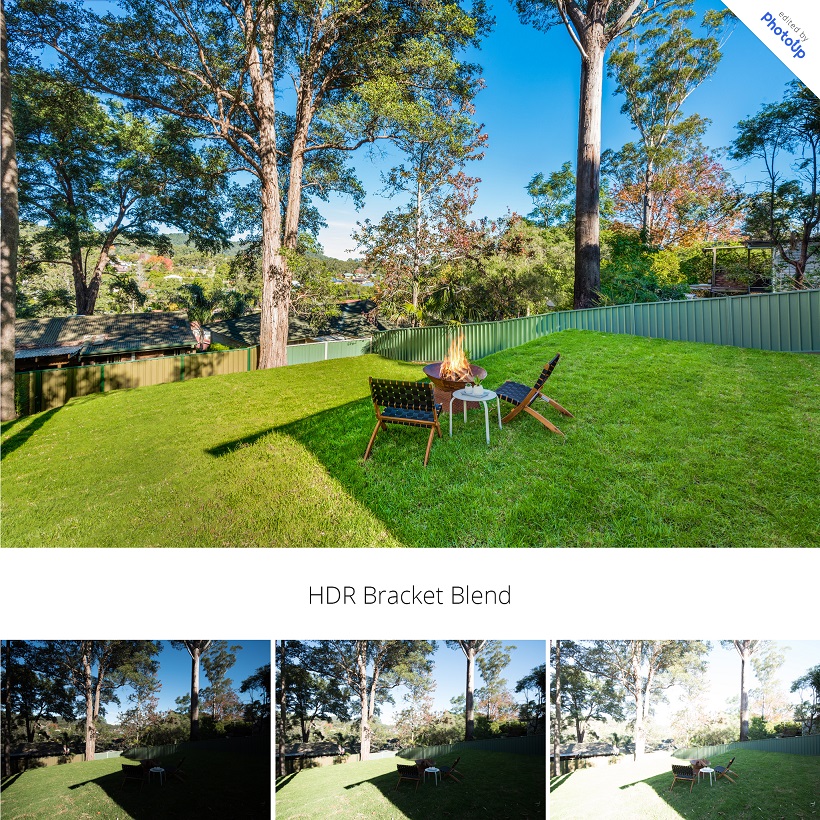
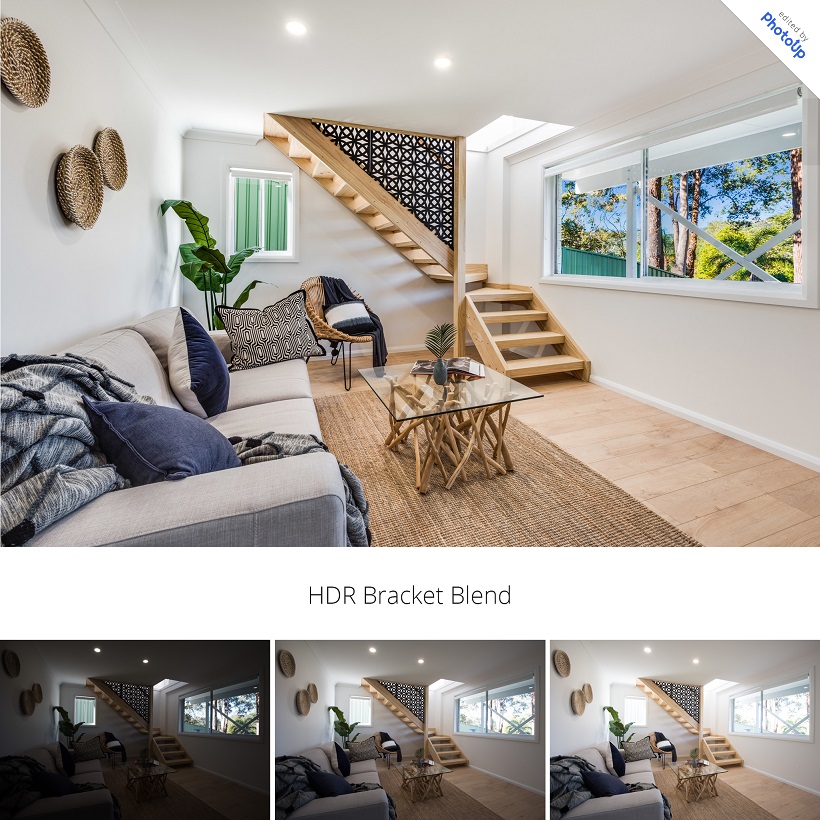
Basically, an HDR photo is a series of photos of the same subject taken at different shutter speeds, thus different exposure levels. These are called “bracketed” images, and each shows varying degrees of luminosity.
Using photo-editing software, bracketed images are blended together to create a single picture wherein all areas are in perfect exposure. Details in all areas are emphasized beautifully.
Many new cameras have a “built-in HDR” setting. Basically, the feature does the blending work in camera. The good thing about it is that, obviously, you don’t have to do any blending yourself. The camera does it automatically.
However, there are some disadvantages:
- you don’t have control over the blending settings
- you don’t have the ability to utilize extra frames for different purposes
- “correcting” sections of an image where the camera did a poor job can be extremely difficult if not impossible
- the resulting shot is in a JPEG format, not a RAW image. This makes additional post-processing difficult
What You Need
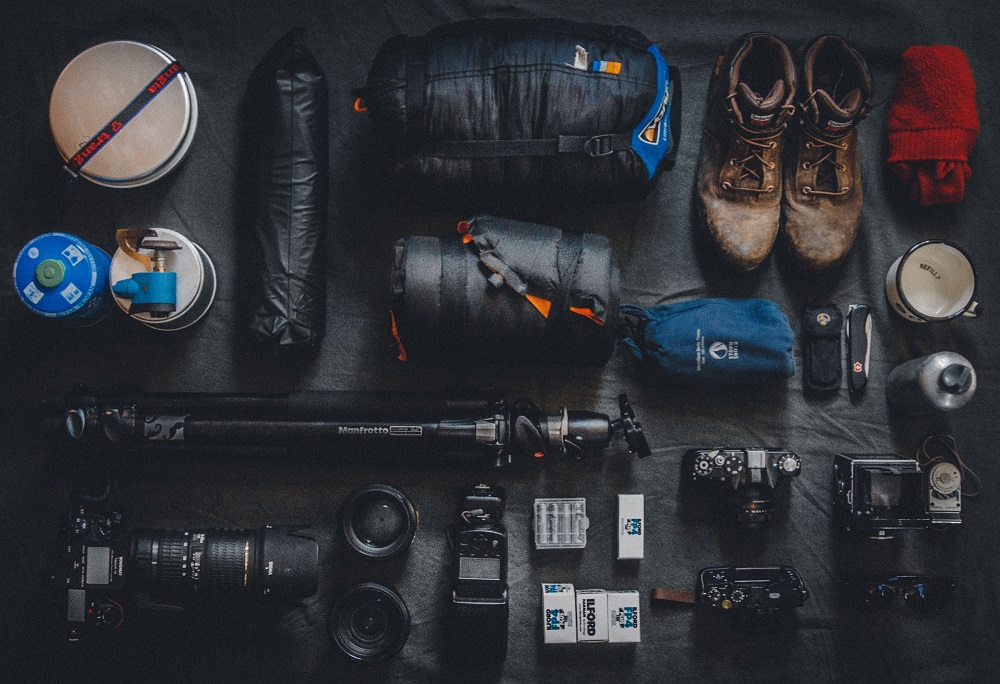
Excited to shoot HDR photos? Cool! But before you do so, you need a few tools.
- A DSLR camera with an Auto Exposure Bracketing (AEB)
You can shoot HDR images without an AEB feature. However, without AEB, you have to manually adjust your camera settings for each exposure. Tinkering on your camera’s controls increases the amount of time it takes to shoot your bracketed photos. More importantly, it increases the likelihood of the camera moving or changing position each time you make the adjustment. - A tripod
This helps stabilize your camera, resulting in crisp images. You can possibly shoot by hand if your camera is equipped with some sort of image alignment feature. However, such features don’t always work perfectly. So it’s much better, safer, and easier to use a tripod. - HDR blending software
There are several starter HDR blending software out there such as Photomatix, Aurora HDR, and Luminance HDR. If you don’t know how to use these programs, don’t worry. Our editors at PhotoUp can blend bracketed photos for you. Just send us your bracketed images, and we’ll do the rest.
You can get started with a trial account at PhotoUp.
Tips for Shooting HDR for Real Estate Photography
Ready to shoot those jaw-dropping HDR real estate photos? Check out these tips.
- Keeping the camera very still is absolutely important in exposure bracketing. You have to remember that HDR is not meant for subjects that move.
- Be watchful for subjects and scenes that have very noticeable contrasts between light and darkness. These images benefit most from post processing.
- Shoot in RAW format to preserve the image quality, prevent loss of detail, and make editing easier. Avoid shooting in JPEG because the format uses a lot of compression to reduce your file size. The result will be a “lossy” photo, with a noticeable loss of detail.
When Not to Use HDR
- Do not shoot in HDR if your subjects are moving (or have a possibility of moving). Remember that the technique involves a series of photos. So if your subject moves between shots, the result could turn out blurry, or discolored.
- Some images actually look better if the scene has stark contrast between light and dark. An example of this would be a silhouette that you wish to highlight against a sunset. HDR actually balances the exposures, making it a less interesting image.
- Look out for colors that are already incredibly vivid such as a field of flowers or brightly colored walls. HDR processing can wash them out or give them an extremely vibrant look, making the final image look “cartoonish”.
HDR can certainly elevate the quality of your real estate photos. For high-quality and metric driven real estate photo editing services, including HDR processing, try out PhotoUp, a premier real estate photo editing company. PhotoUp is highly recommended by members of the Photography for Real Estate blog.
When you sign up for PhotoUp, a team of photo editors ensures customized editing and fast 12 to 24-hour turnaround. You will be given access to a comprehensive all-in-one photo management system. Here you can upload and receive photos, send instructions and feedback, track and manage team members and clients, and more!
Start your trial account today!
Sources
https://lifehacker.com/5991508/what-is-hdr-and-when-should-i-use-it-in-my-photos
https://www.digitaltrends.com/photography/what-is-hdr-photography/