Dull, overcast skies can make a stunning real estate photo dreary. Or you might think that a glowing sunset would do great justice to an image of a property on a beautiful beach.
Well, you can replace skies with a few easy tricks using Adobe Photoshop.
1. Import an exterior photo of a property in Photoshop. The sky should be prominent in the image.
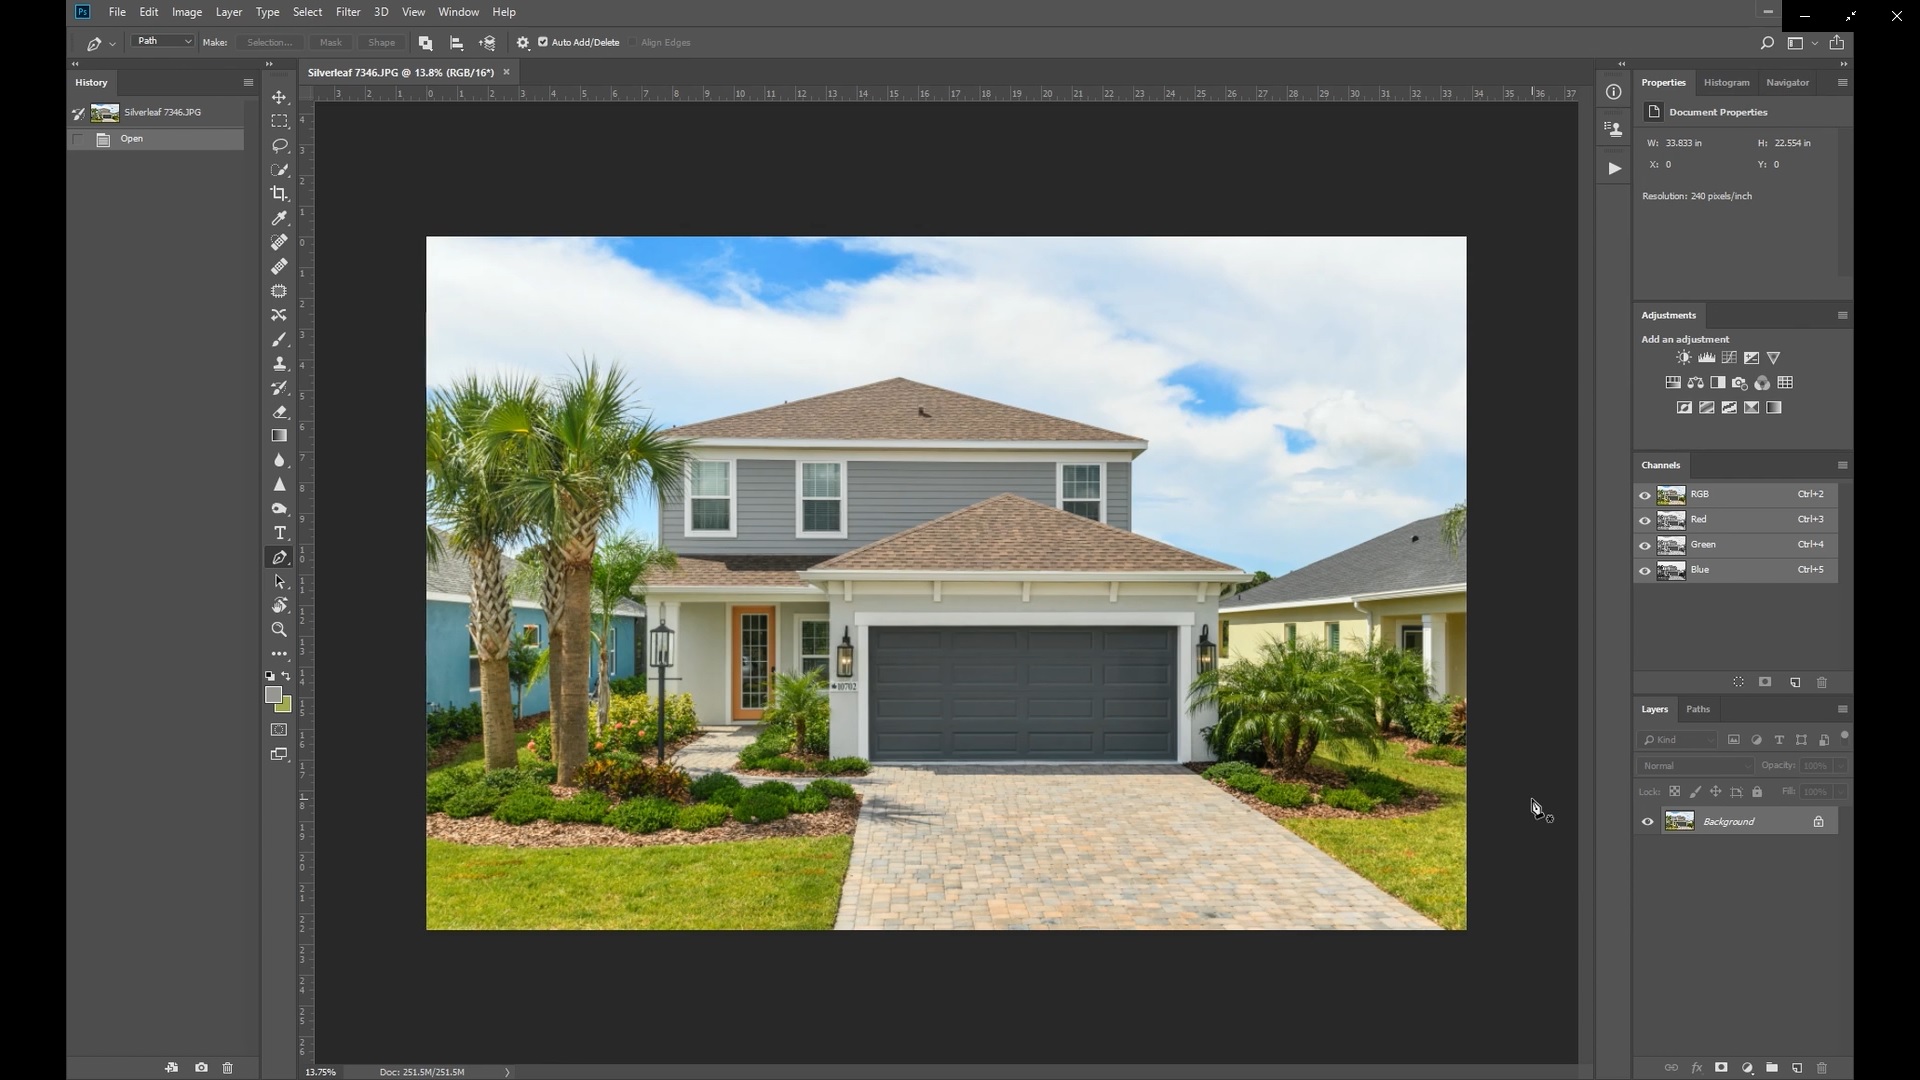
2. In the Channels panel, select the BLUE layer to duplicate it. Drag and drop it to Create a New Channel icon as shown in the GIF below.
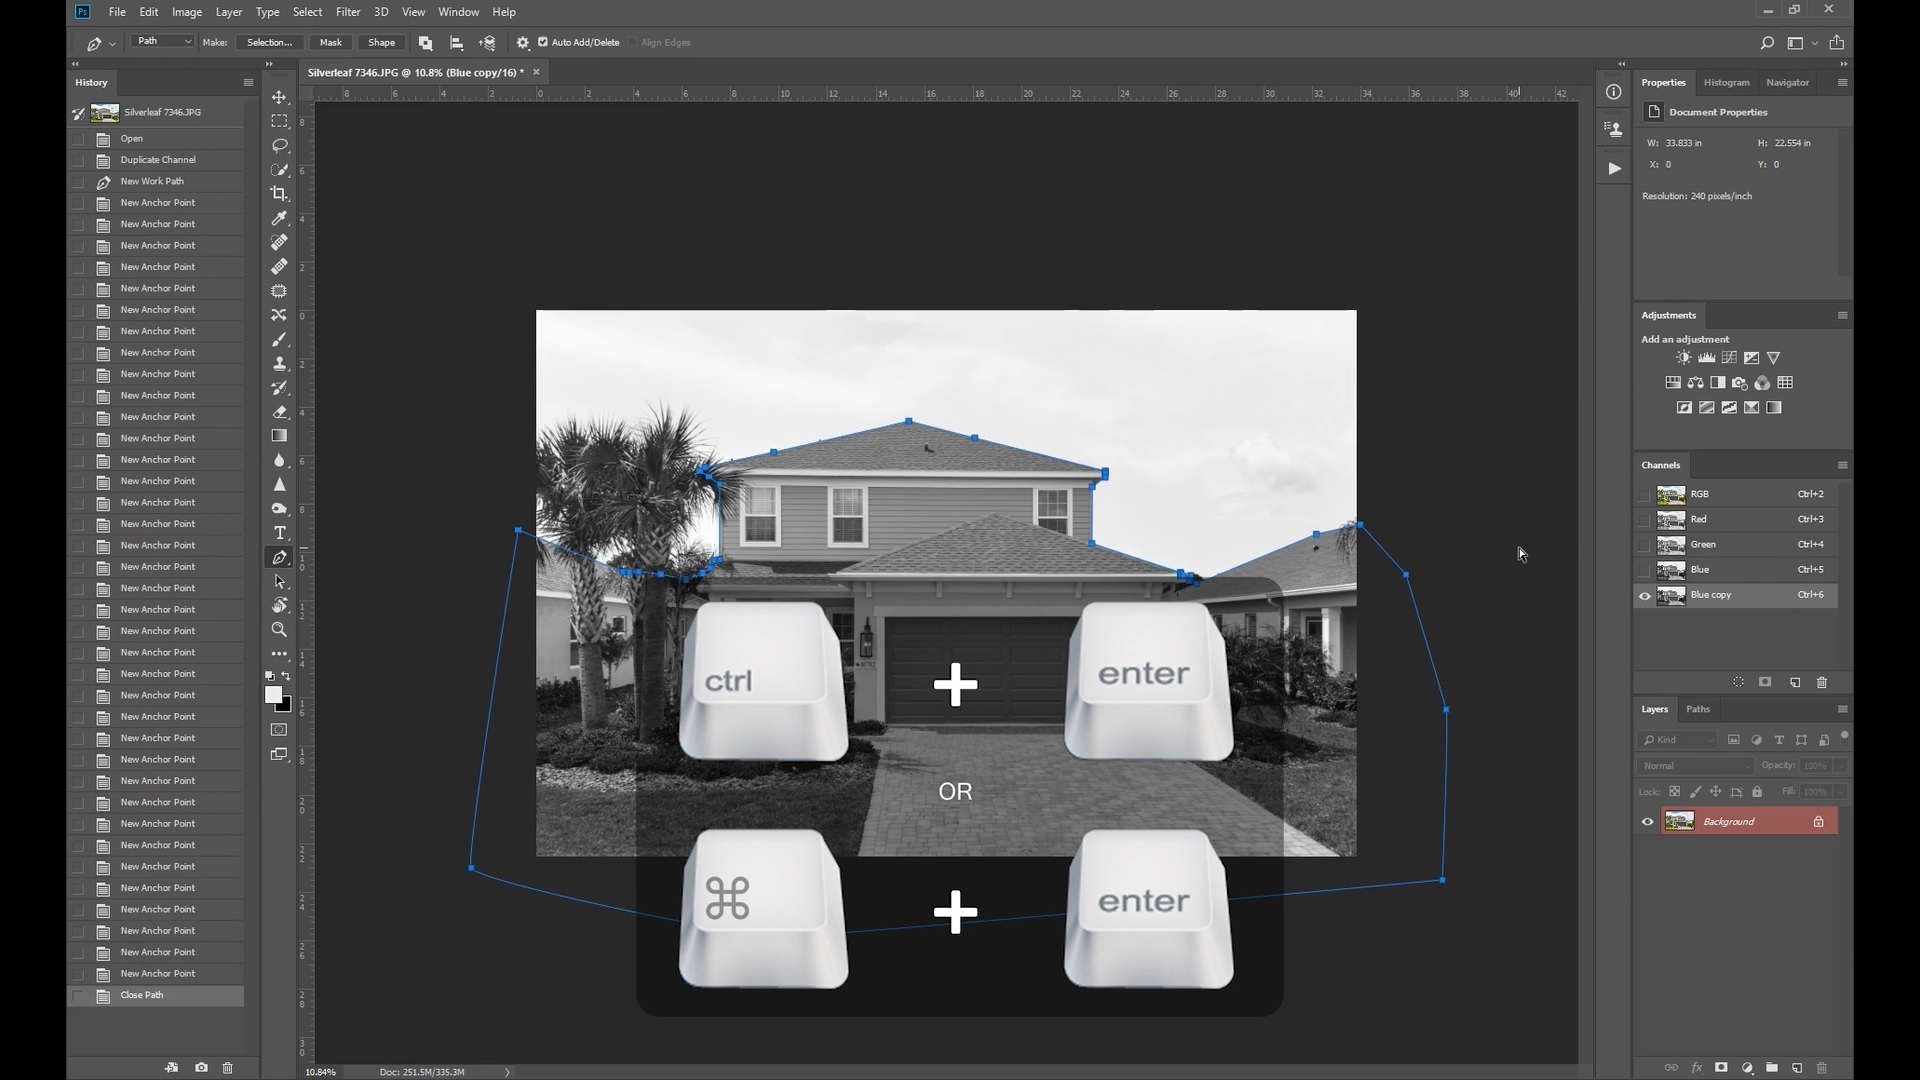
3. Select the Pen tool or press P on your keyboard.
4. Trace the outline of the property, making sure that the cursor goes back to the starting point.
5. Press Ctrl and Enter or Command and Enter keys. This creates a selection within the outline.
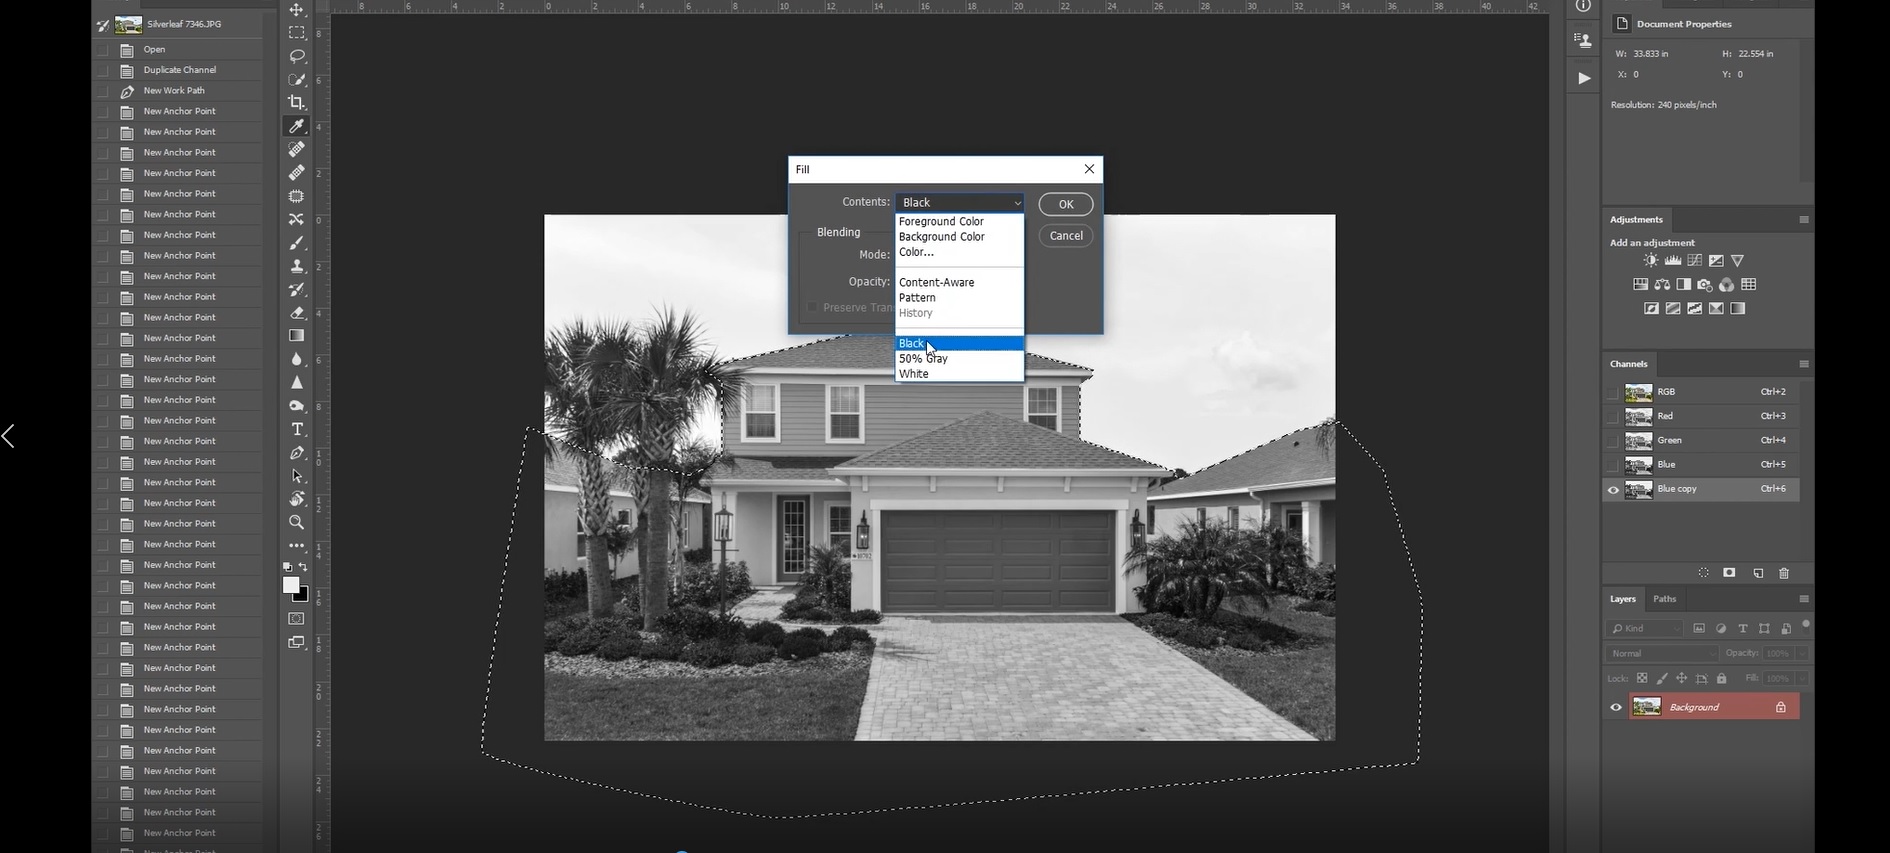
6. Press Delete. A pop-up Fill window appears. Select Black from that window and click OK. The entire selected area should be filled with black.
7. Press Ctrl and L or Command and L keys to set the Levels.
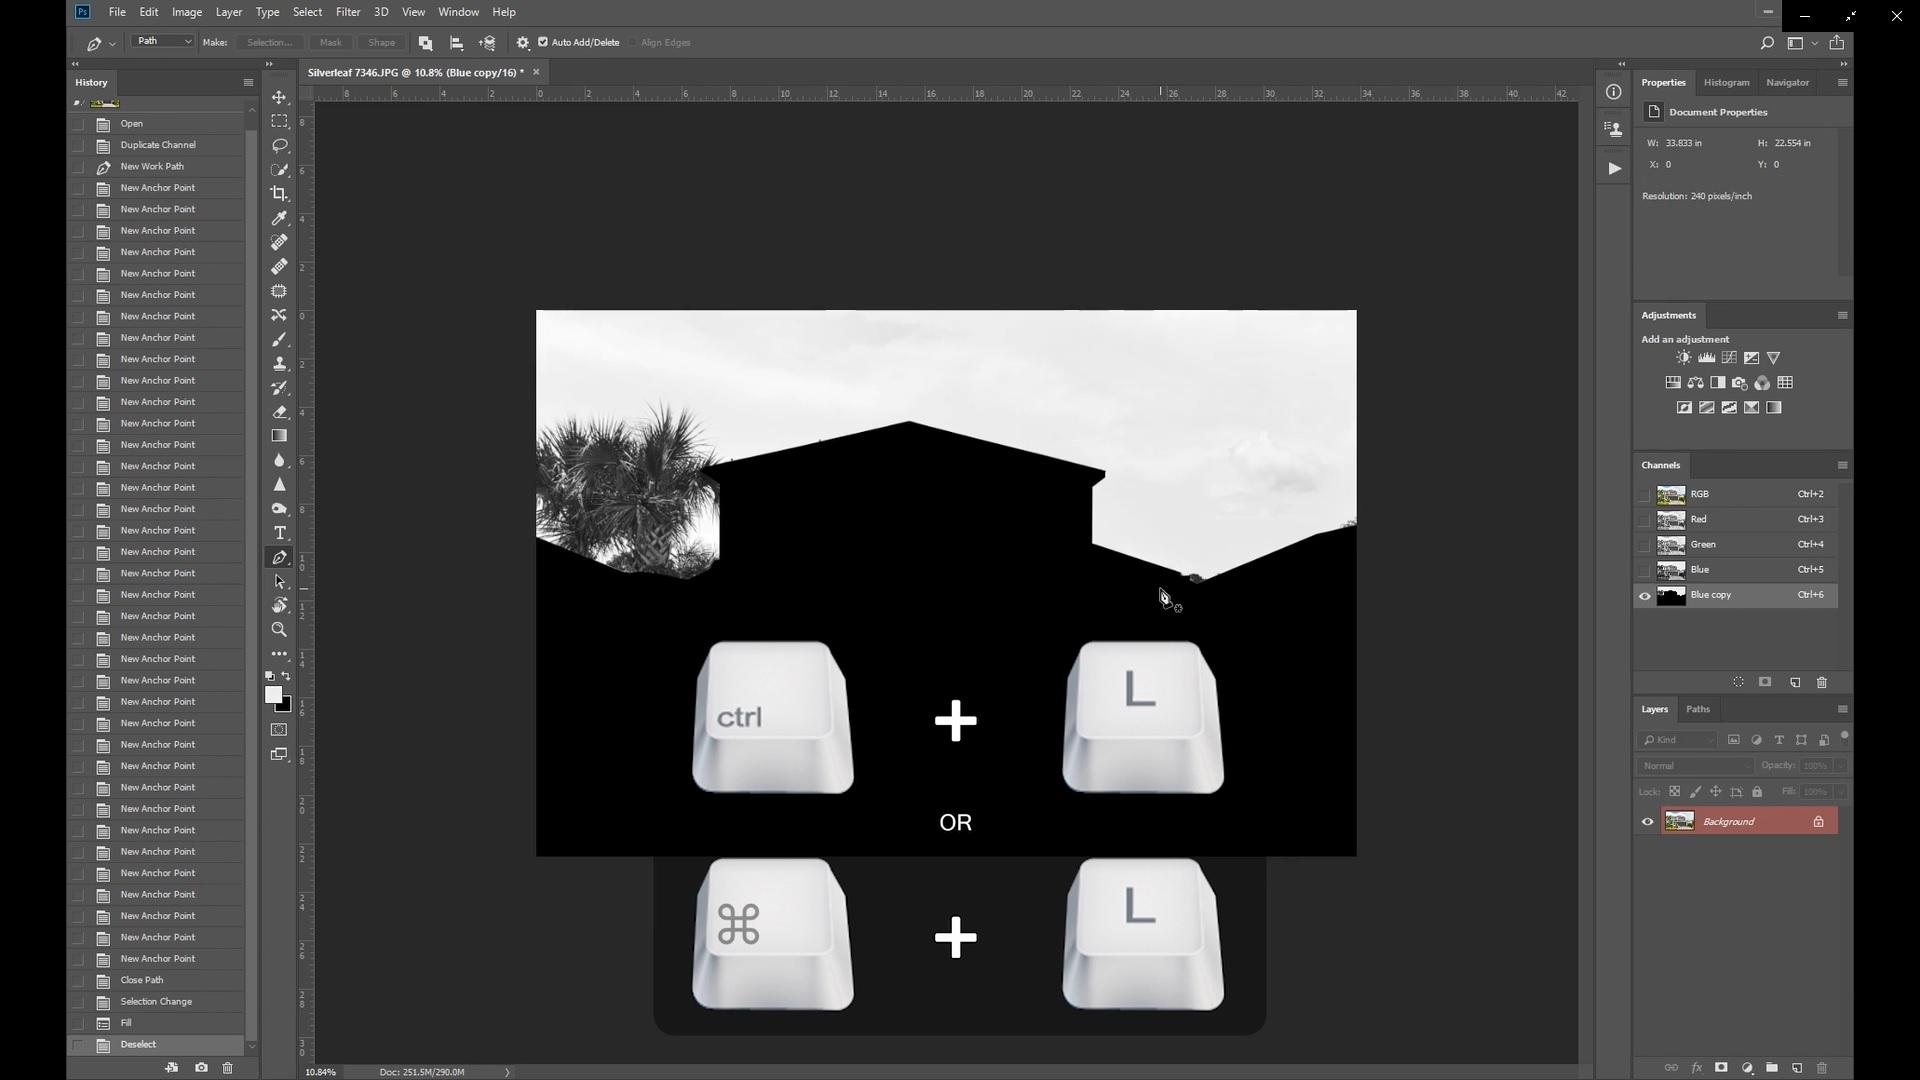
8. A pop-up Levels window appears. Drag the histogram’s cursor to the right to darken the shadows. This will darken other objects in the image such as tree leaves. Be careful not to overdo the effect; it should darken the objects without affecting the color of the sky.
9. On the same pop-up window, click the Dropper icon. Choose the rightmost icon then click on the sky. Then click OK.
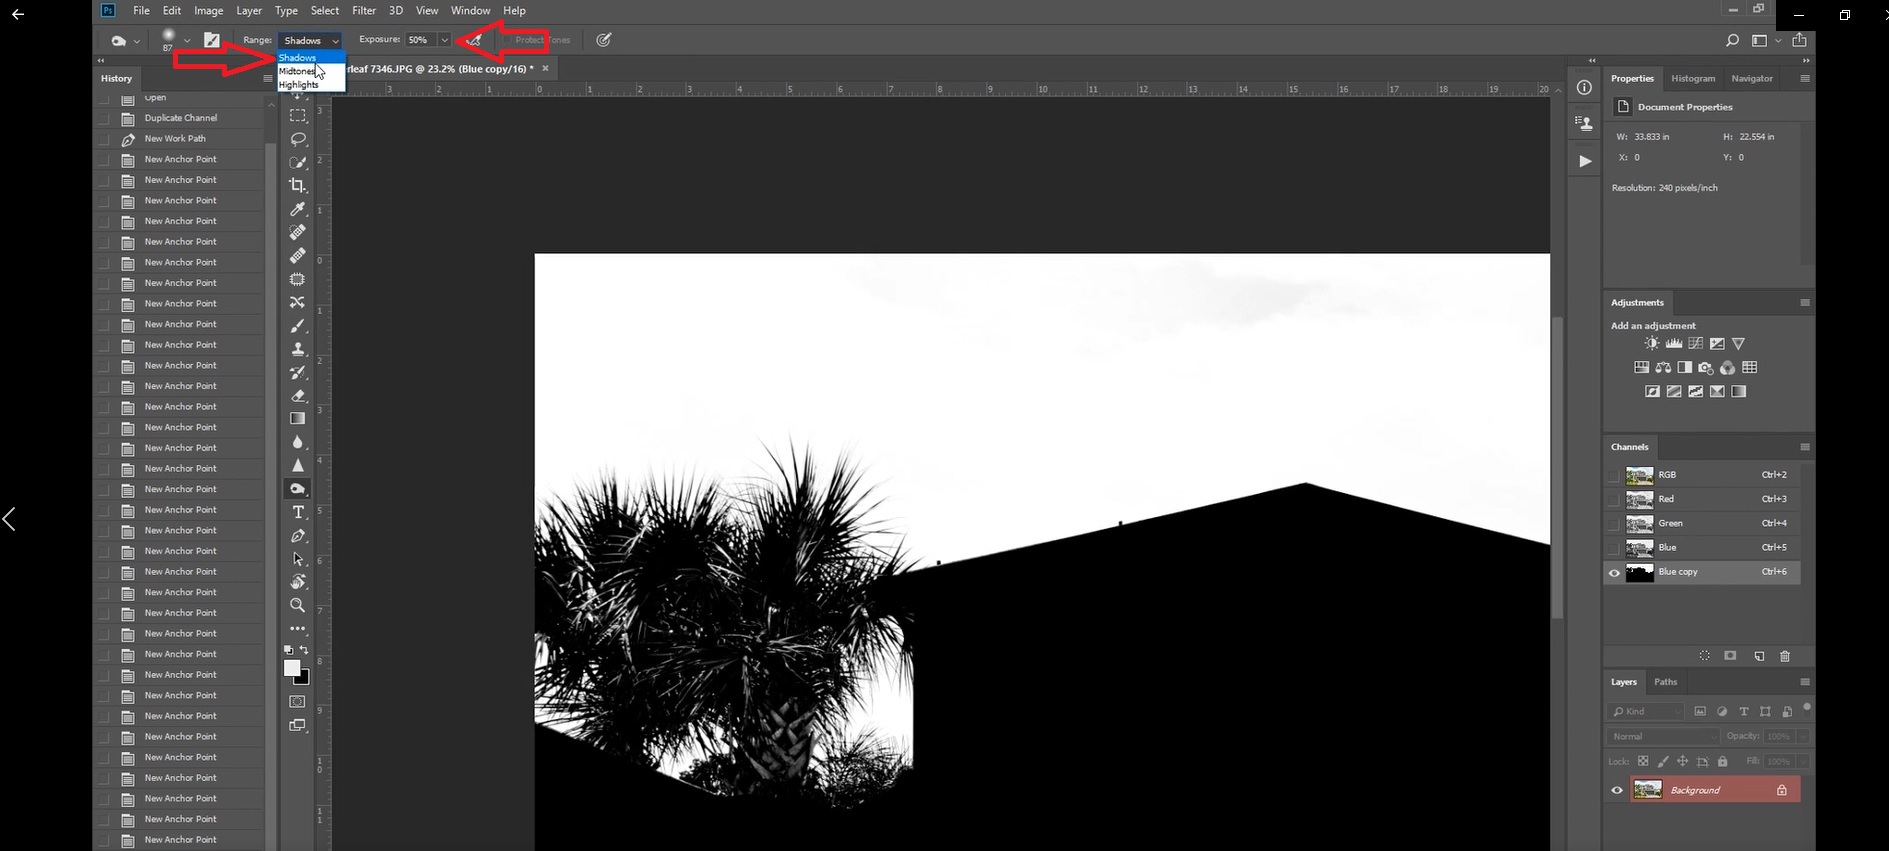
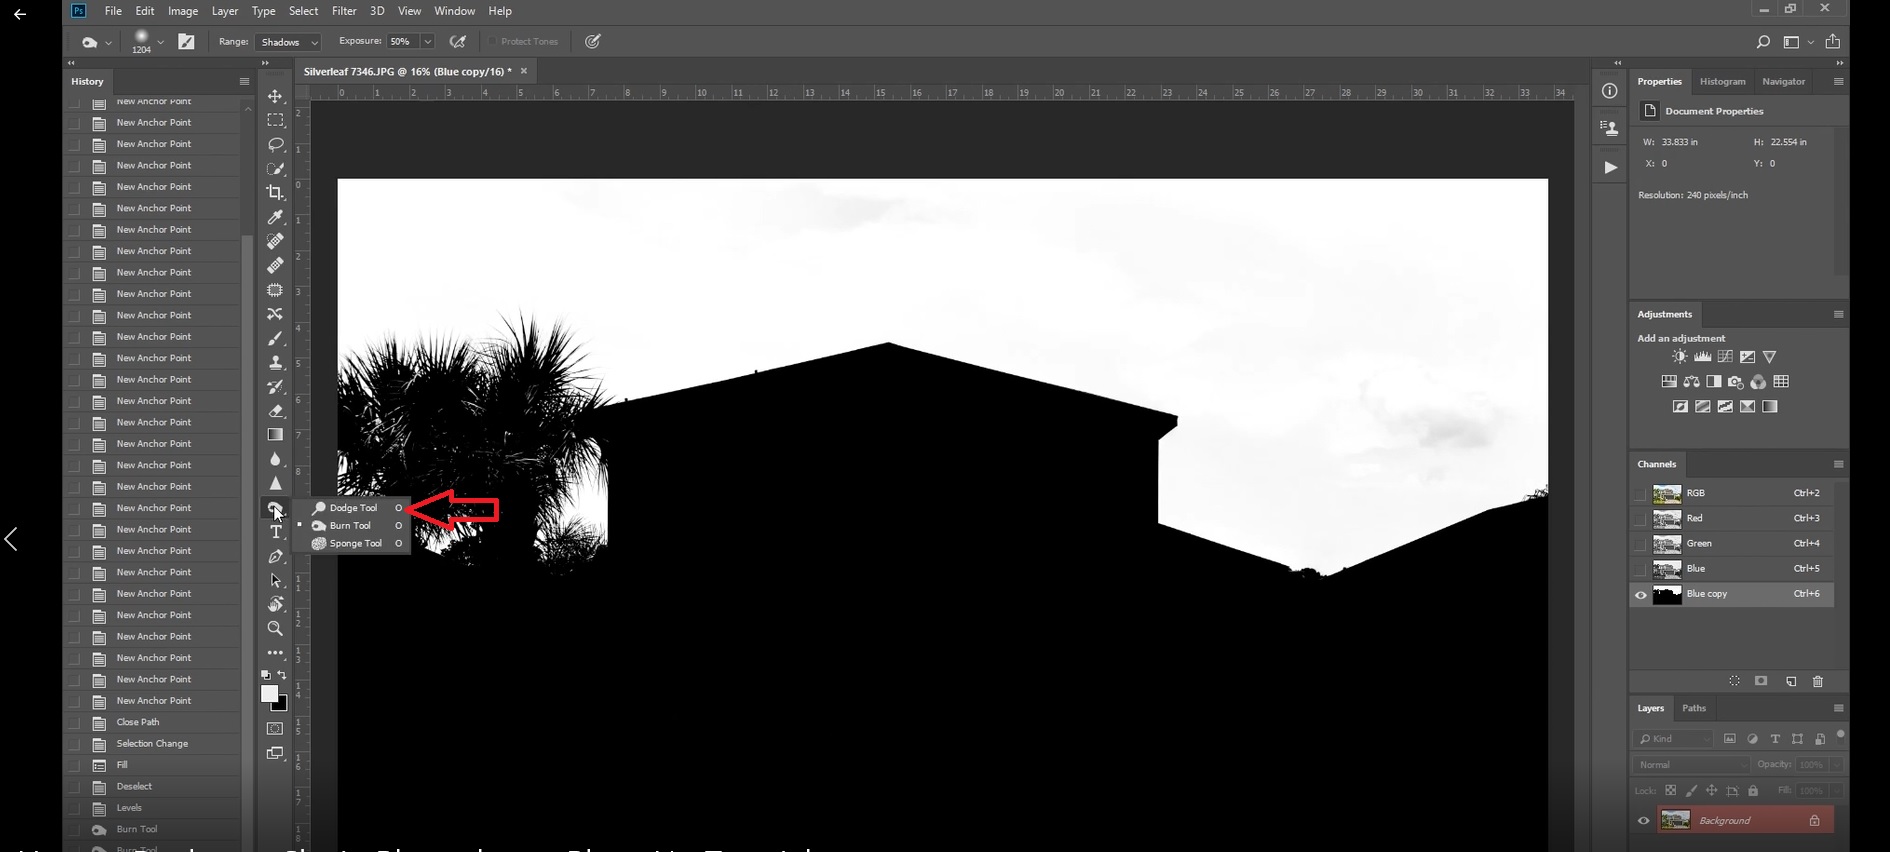
10. Some parts of the selections may not be completely black, which can affect the sky replacement process. To fix this, select the Burn tool and set the Range to Shadows. Set the Exposure to 50%.
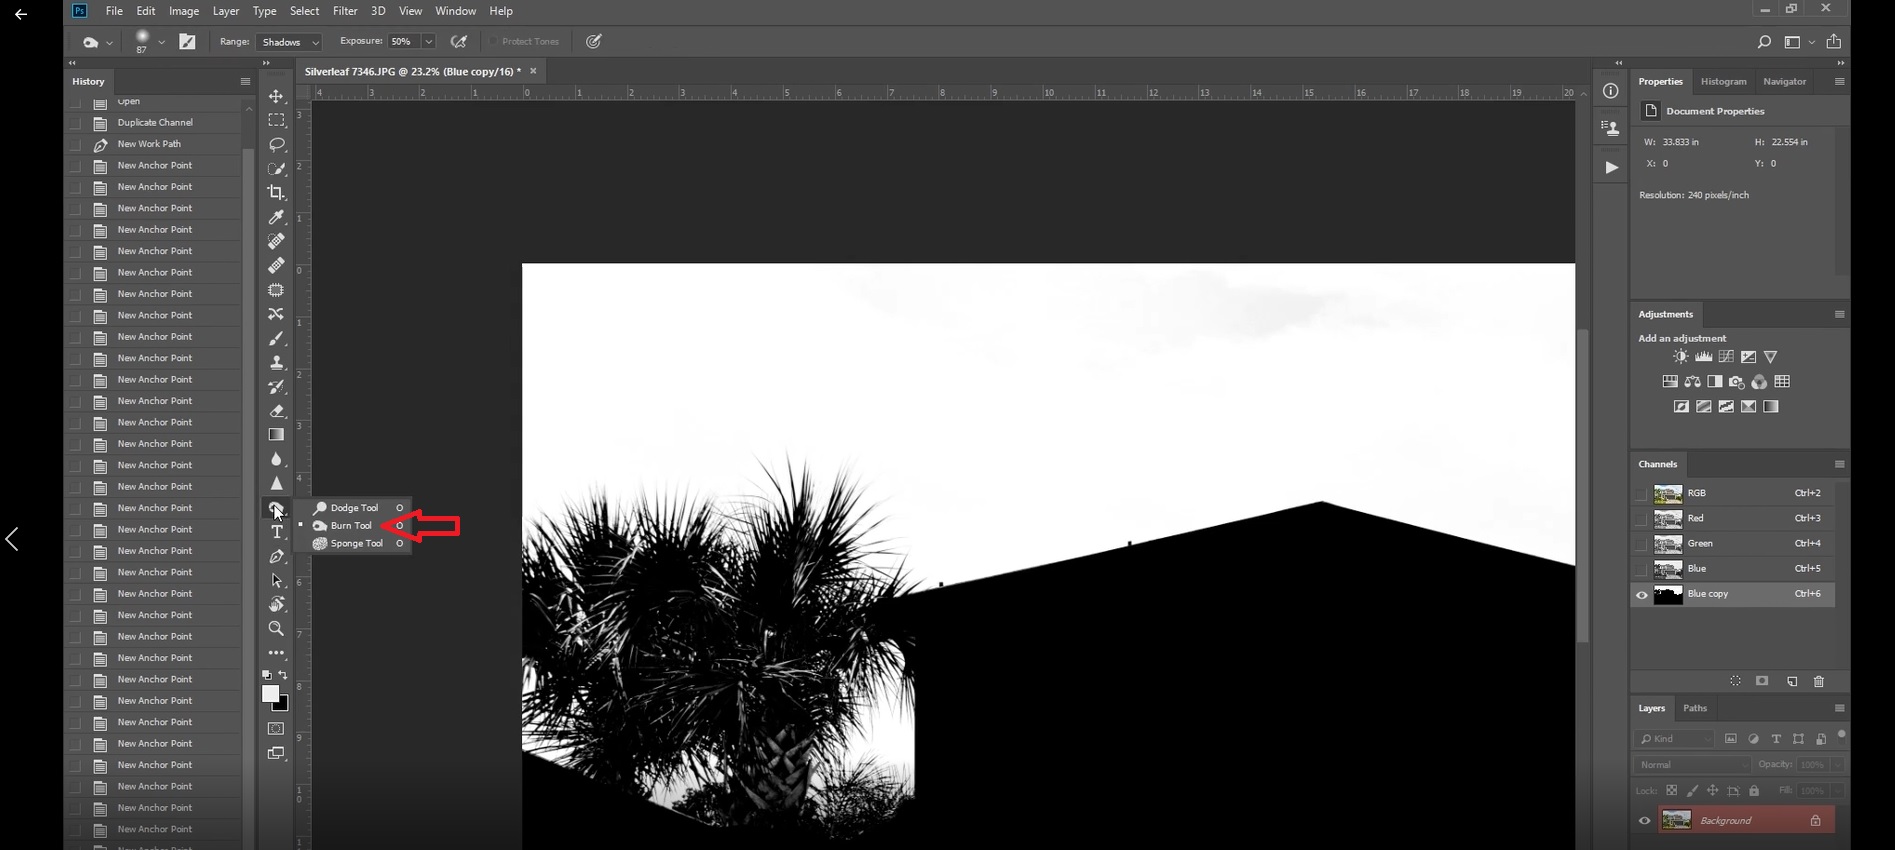
11. Brush on the areas that should be black.
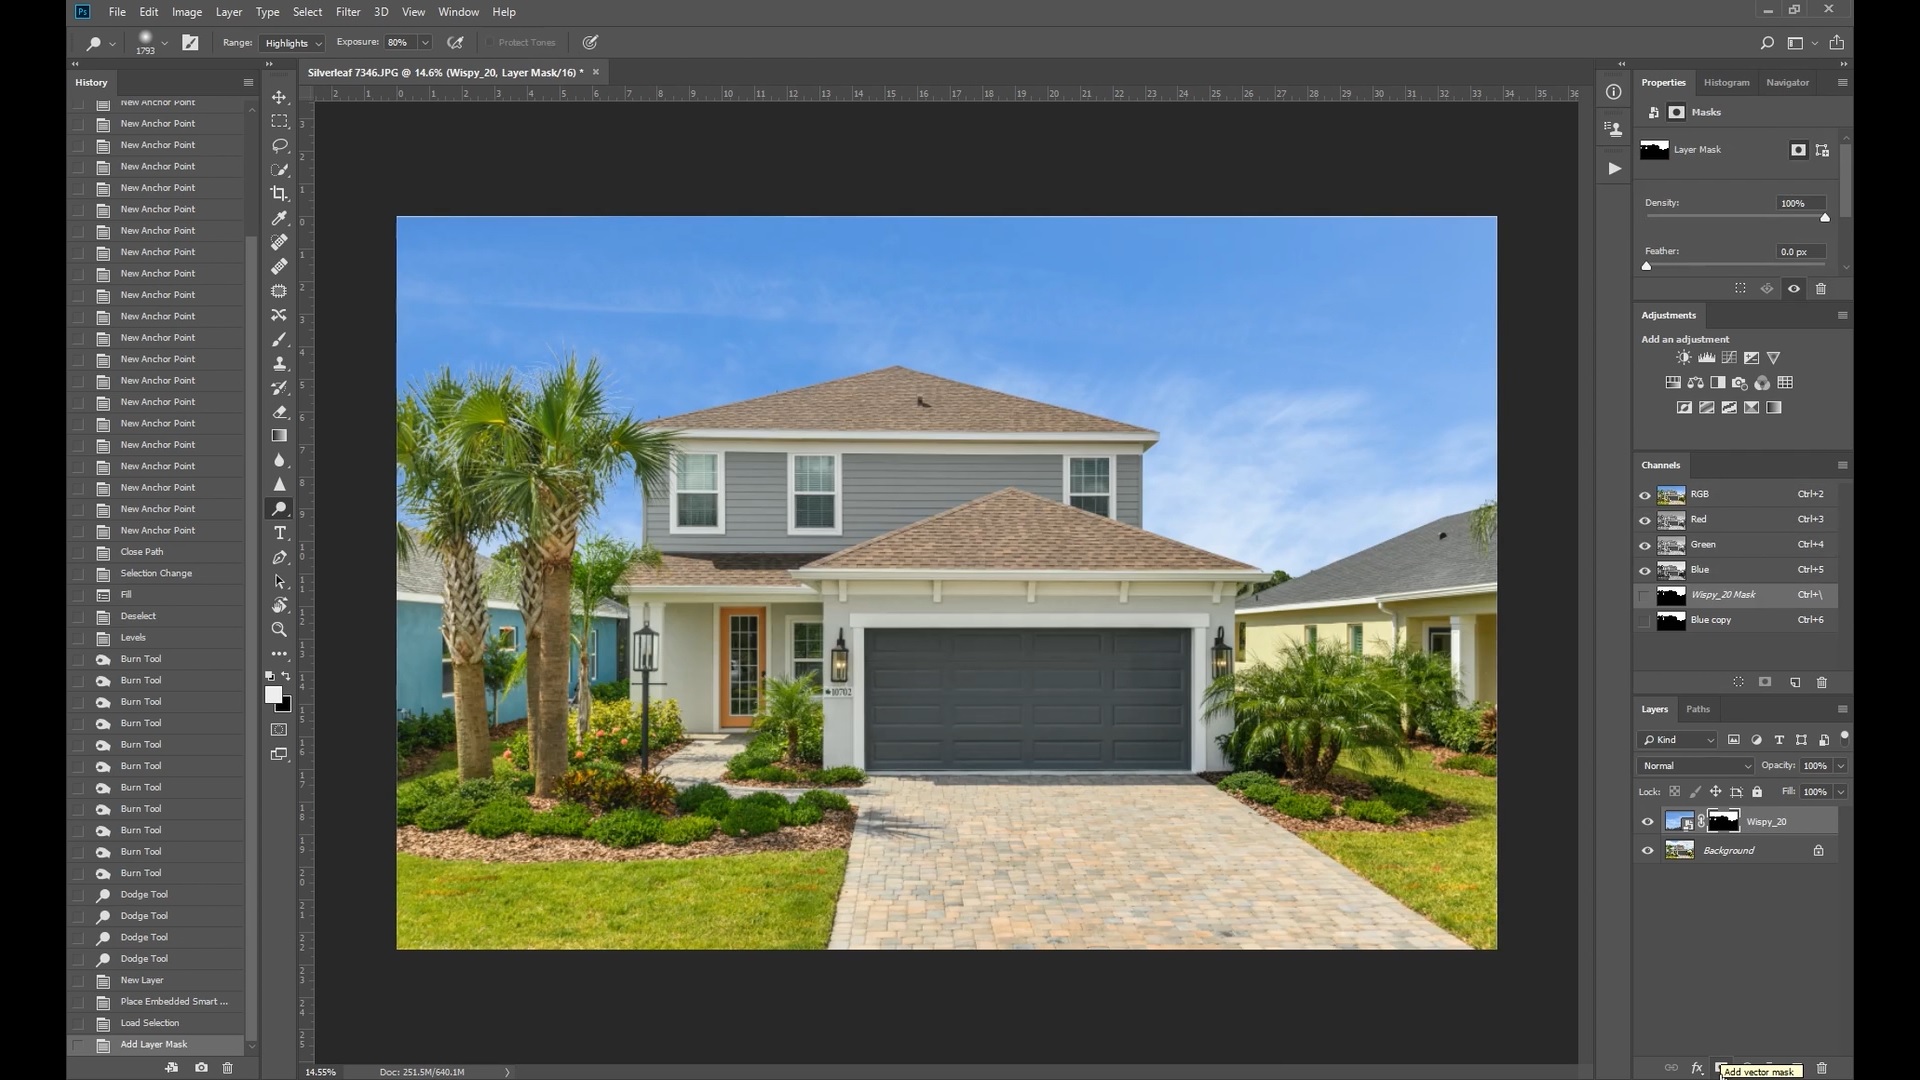
12. Now it’s time to whiten the skies. Click on the Dodge tool and set the Range to Highlights. Set the Exposure to 80%.
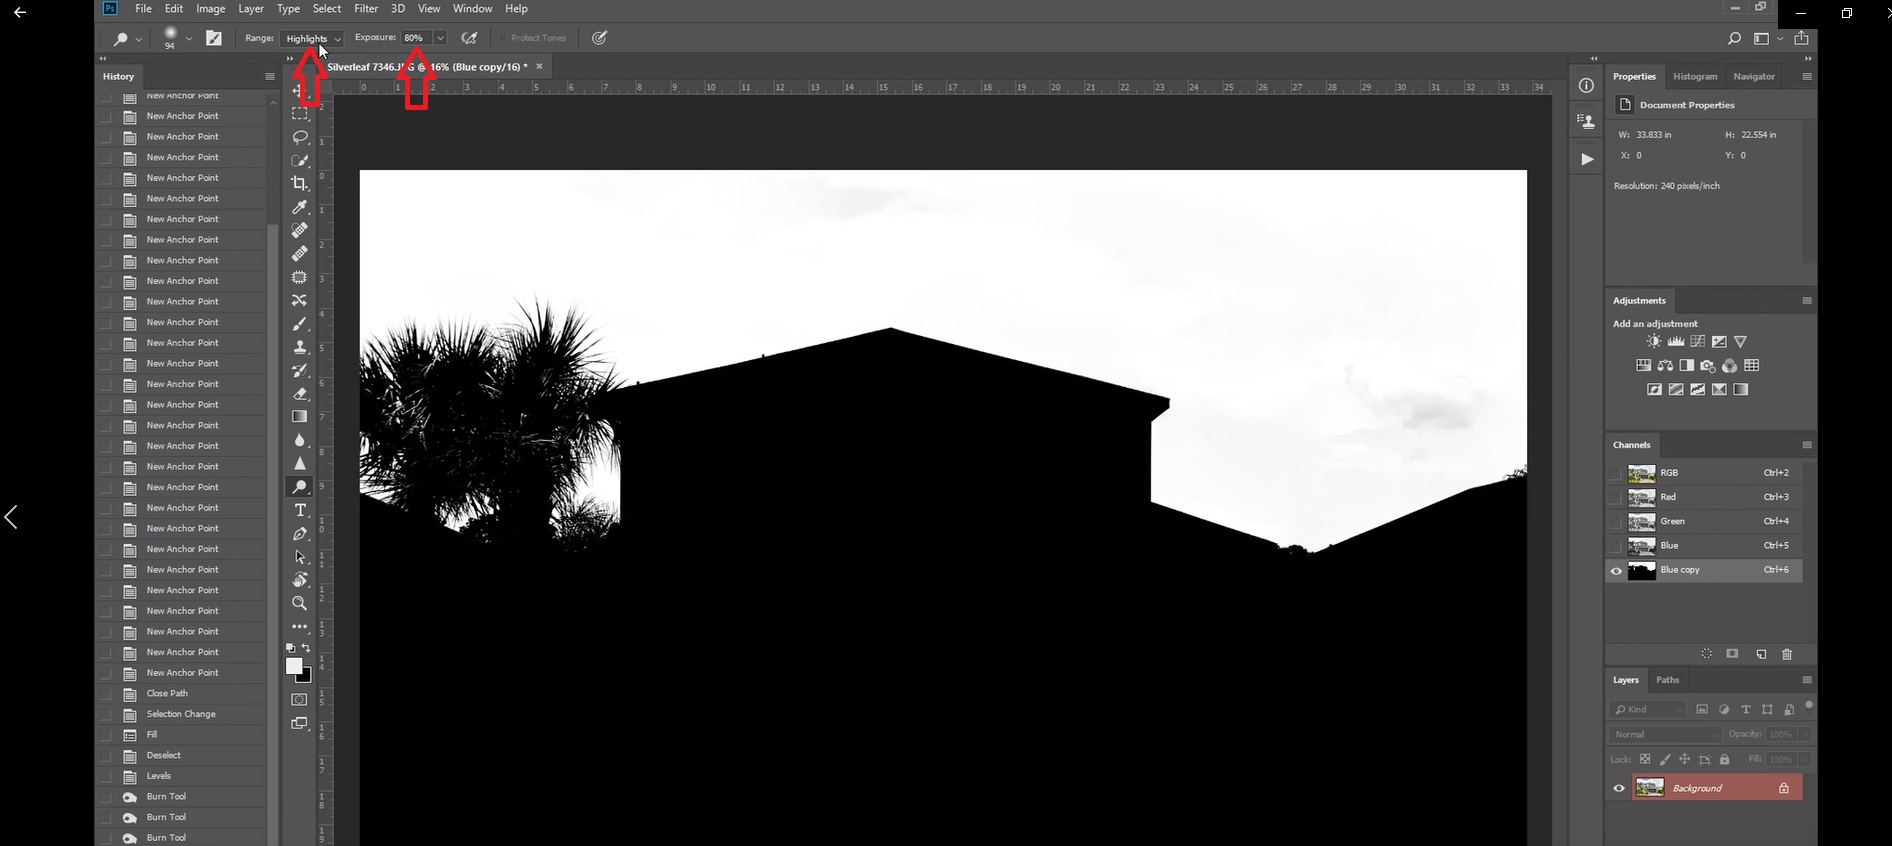
13. Brush on the sky area until it is completely white.
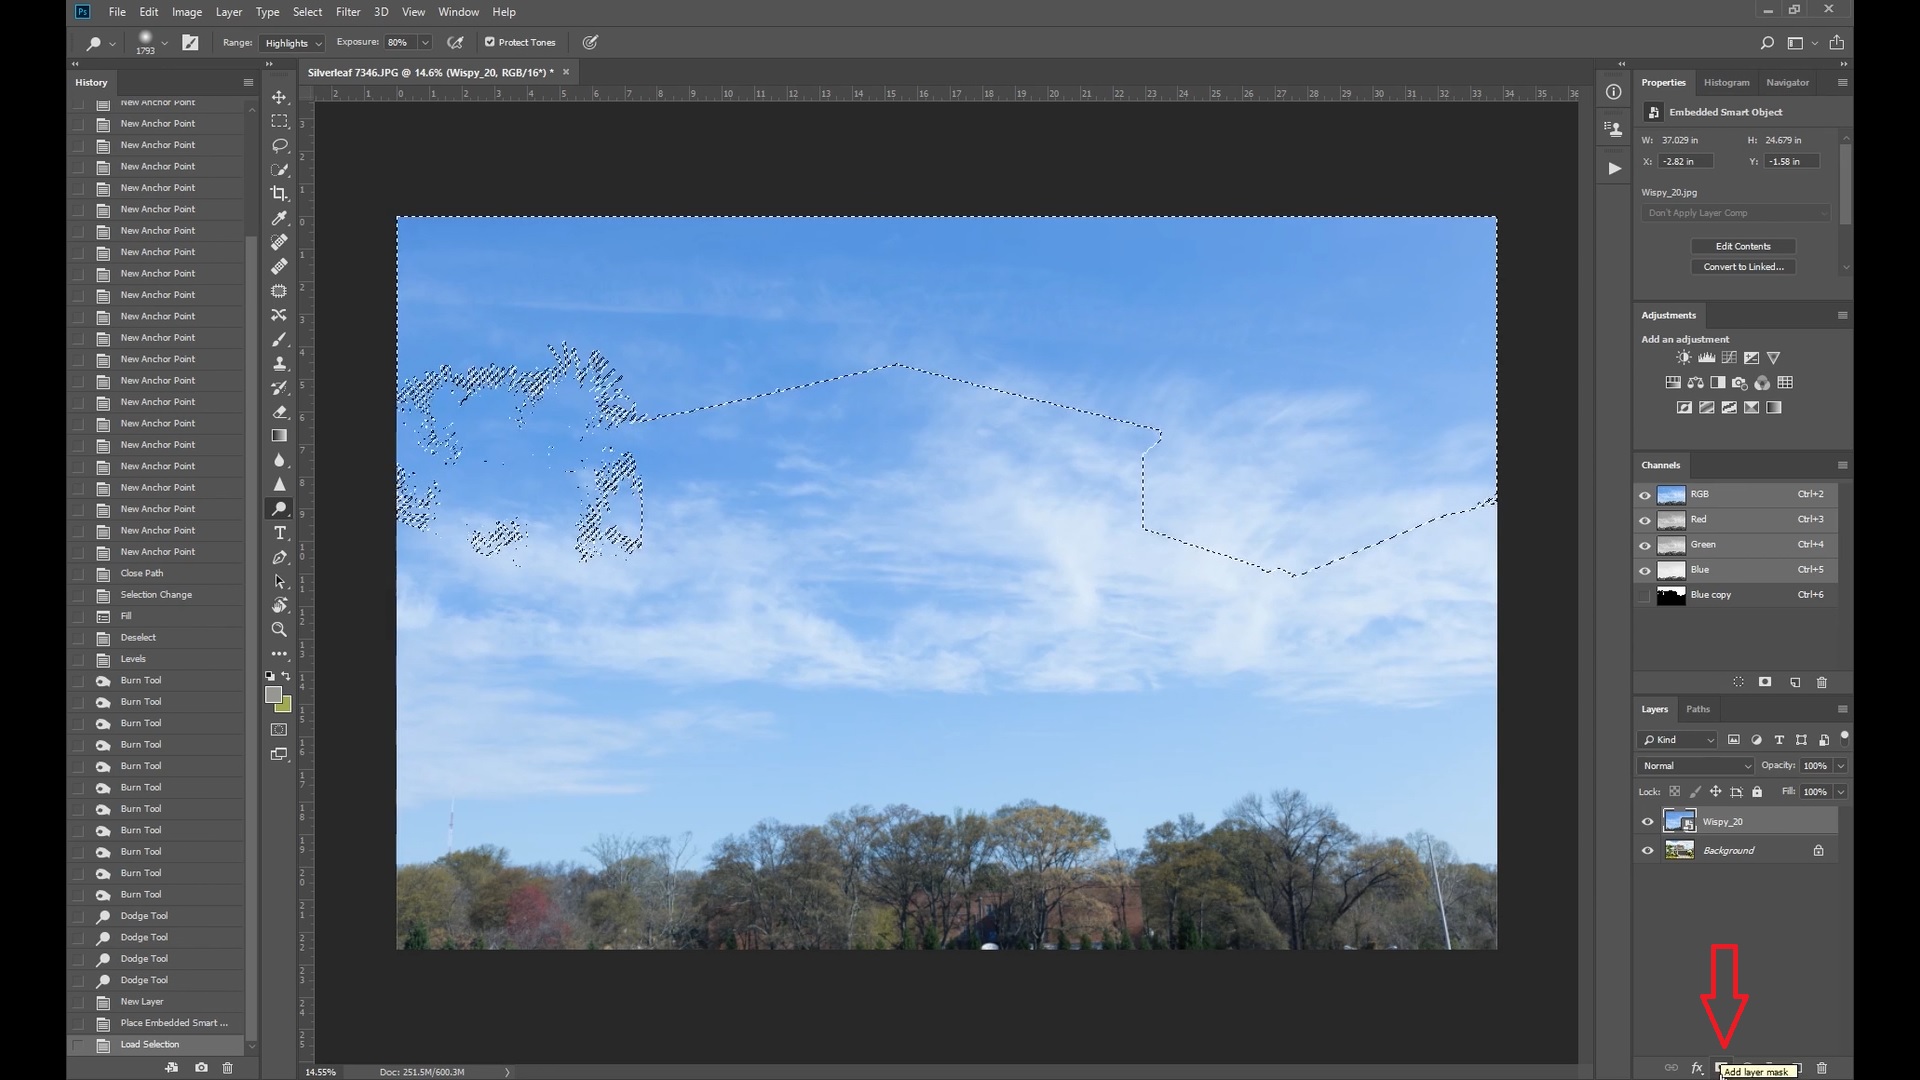
14. Click on the New Layer icon then drag and drop your ideal sky on the black and white image.
15. Adjust the size and position of the sky and hit Enter.
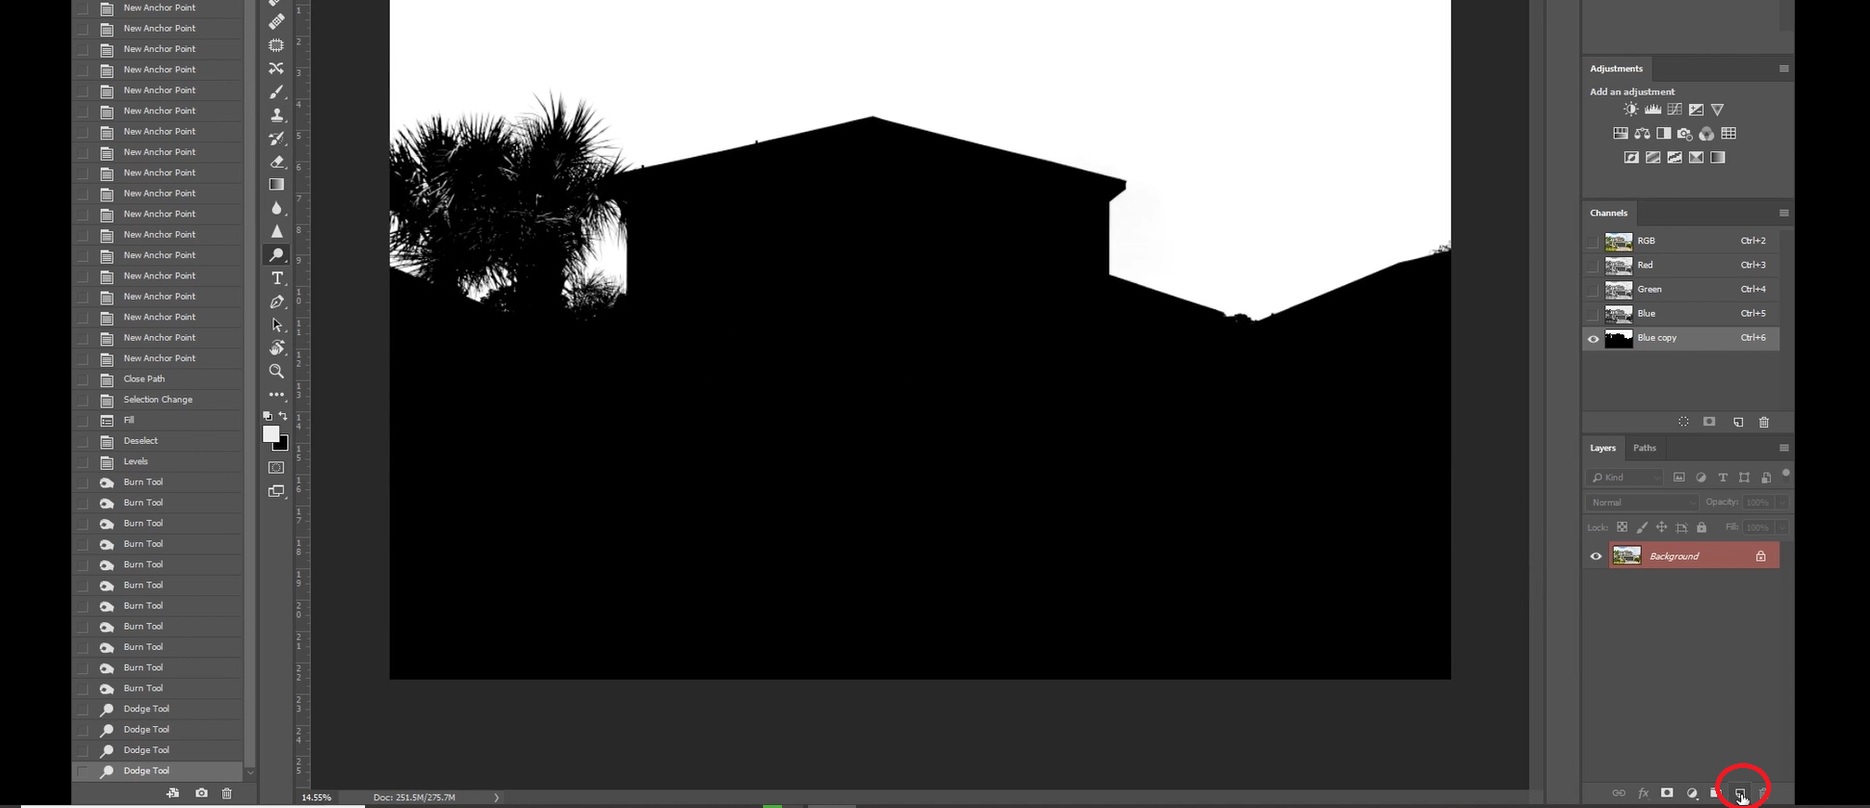
16. Hold Ctrl or Command key on your keyboard then click on the layer you made earlier on the Channels panel. This will create a selection.

17. Click on the Masking icon at the bottom of the window.
It’s that easy! But do you still find it a bit complicated? No worries! PhotoUp has a team of team of photo editors who can professionally custom edit your real estate photos to your preference. We offer a fast 12 to 24-hour turnaround. Finally, after signing an account, you’ll get your own all-in-one photo management system so you can upload and receive photos, send instructions and feedback, and track and manage team members and clients, and more!
What are you waiting for? Sign up for an account today!