When shooting real estate photography, large flat-screen TVs are prominent appliances in dens, bedrooms, living rooms, and family rooms in any home. Here’s a neat and easy trick to add a TV image in an otherwise empty TV screen using Adobe Photoshop:
1. Open an image of an interior space in Photoshop. The interior space should feature a TV screen.
![]()
2. Open a folder of containing high-resolution images of scenes that you want to put in the TV screen. Choose a preferred scene that you want to insert to the TV screen.
![]()
3. Resize the photo so that it is slightly smaller than the TV screen.
![]()
4. Drag and drop that image to the Photoshop window.
![]()
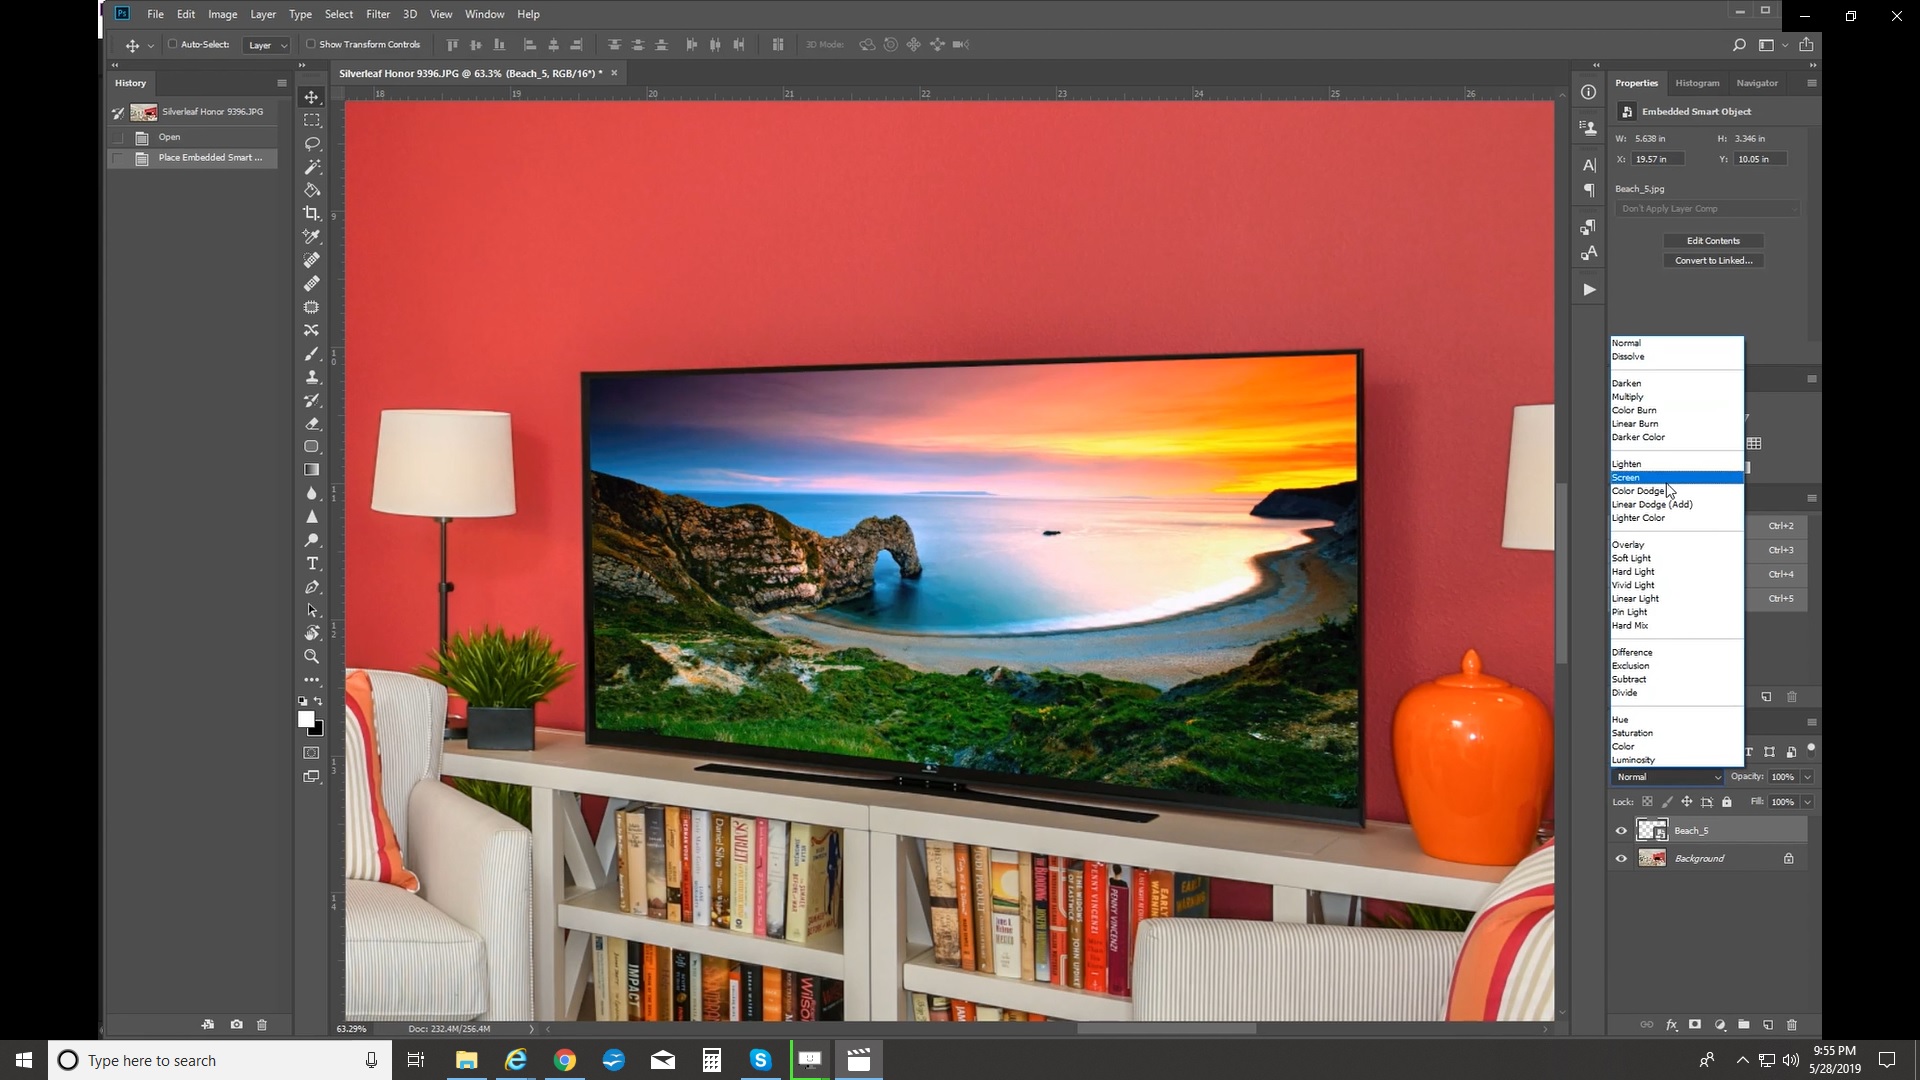
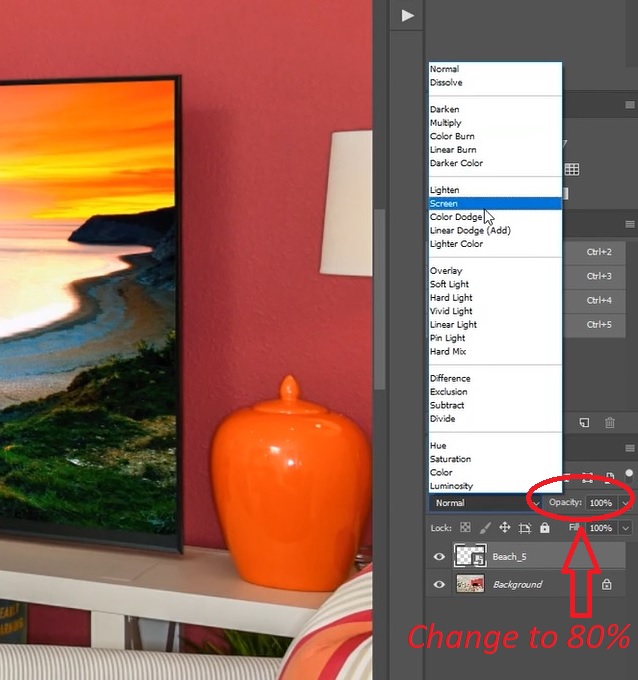
4. Using the image’s reference points, correct the perspective of the image. Press down the CTRL key and while doing so, drag the reference points of the corners of the image towards the corners of the TV screen. Then press Enter.
![]()
5. To reduce the opacity of the image, change the blending mode to Screen. Reduce the opacity of the image to around 80%. This will make the image less intense and blend well into the TV screen.
Having trouble editing your real estate images? Tired of spending countless hours per week adding images to TV screens? PhotoUp has your back! Our team of skilled real estate photo editors ensures customized editing in your style and fast 12 to 24-hour turnaround. You can upload and receive photos, send instructions and feedback, track and manage team members and clients, deliver photos and get paid from your clients, all through our comprehensive photo management system.
Want to see what PhotoUp can do? Sign up for a trial account today! 🙂